19 Spooktacular Easy Pumpkin Crafts for Adults
As the leaves begin to change and the air turns crisp, there’s no better way to celebrate the arrival of fall than by diving into some festive pumpkin crafts. I love getting creative and Halloween is the perfect time of year for me to do that. There are so many easy pumpkin crafts for adults and for many of them you really don’t need much in the way of craft supplies so they’re pretty budget-friendly too.
Whether you’re a seasoned crafter or just looking for a fun weekend project, these 19 easy pumpkin crafts for adults offer something for everyone. From elegant table centerpieces to whimsical Halloween decorations, these projects are designed to bring a touch of autumnal charm to your home.
I also have some fantastic pumpkin craft ideas for children too. So, if you want to get the kids involved these are really worth a look.
Crafting with pumpkins isn’t just about creating beautiful decorations – it’s also a wonderful way to unwind and enjoy the season. These projects use a variety of materials and techniques, ensuring that you can find something that suits your skill level and interests.
So gather your supplies, put on some cozy music, and get ready to embrace the spirit of fall with these delightful pumpkin crafts.
19 Easy Pumpkin Crafts for Adults

1. Painted Pumpkin Planters

Transform ordinary pumpkins into charming planters for your fall flowers. This craft is perfect for adding a festive touch to your porch or indoor decor.
Materials:
- Small to medium-sized pumpkins
- Acrylic paint (various colors)
- Paintbrushes
- Craft knife
- Spoon
- Soil
- Plants or flowers
Instructions:
- Prepare the Pumpkin: Cut the top off the pumpkin using a craft knife and scoop out the seeds and pulp with a spoon.
- Paint the Pumpkin: Use acrylic paint to decorate the outside of the pumpkin. You can create patterns, faces, or solid colors.
- Let it Dry: Allow the paint to dry completely.
- Planting: Fill the hollowed pumpkin with soil and plant your flowers or plants inside.
- Display: Place your pumpkin planter on your porch or inside your home.
2. Glitter Pumpkins
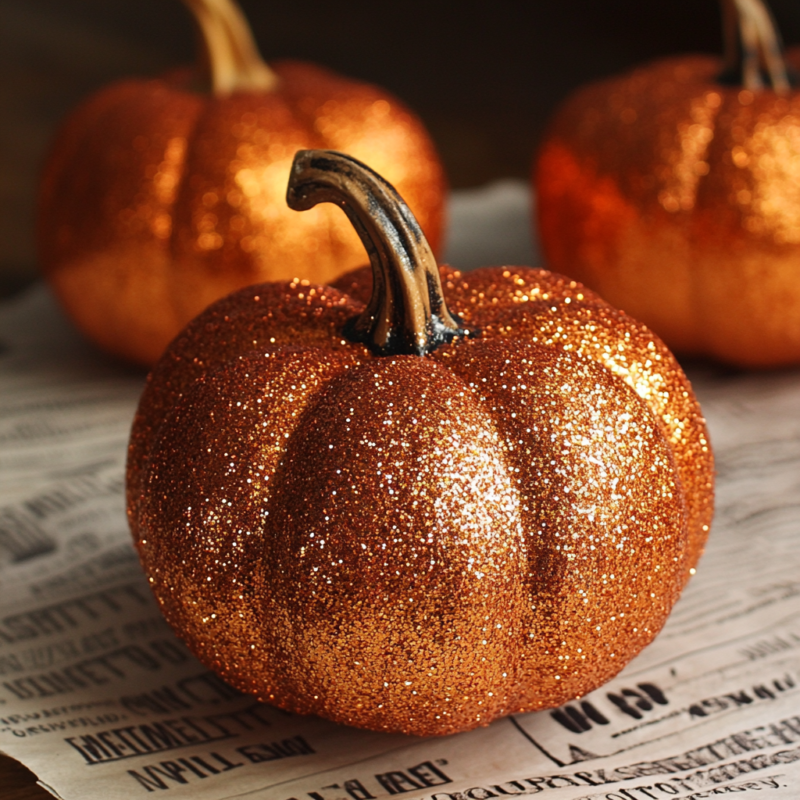
Add some sparkle to your fall decor with glitter pumpkins. These are perfect for a glamorous touch to your Halloween or Thanksgiving decorations.
Materials:
- Small to medium-sized pumpkins
- Mod Podge or white glue
- Paintbrush
- Glitter (various colors)
- Newspaper or drop cloth
Instructions:
- Prepare the Area: Lay down newspaper or a drop cloth to catch any excess glitter.
- Apply Glue: Using a paintbrush, apply a thin layer of Mod Podge or white glue to the surface of the pumpkin.
- Add Glitter: Sprinkle glitter generously over the glued areas. Rotate the pumpkin to cover it evenly.
- Shake Off Excess: Gently shake off any excess glitter onto the newspaper.
- Dry: Allow the pumpkin to dry completely before handling or displaying.
3. Fabric-Covered Pumpkins

Create cozy, fabric-covered pumpkins that add a soft, rustic charm to your fall decor. This craft is great for using up fabric scraps.
Materials:
- Small to medium-sized foam or plastic pumpkins
- Fabric (various patterns)
- Scissors
- Hot glue gun and glue sticks
- Twine or ribbon
Instructions:
- Cut Fabric: Cut a piece of fabric large enough to cover the entire pumpkin, leaving some extra to tuck in at the bottom.
- Cover the Pumpkin: Place the pumpkin in the center of the fabric. Gather the fabric up around the pumpkin, tucking it into the top and bottom.
- Secure with Glue: Use a hot glue gun to secure the fabric at the top and bottom of the pumpkin.
- Add Twine or Ribbon: Wrap twine or ribbon around the stem area to cover any exposed fabric edges and secure it with a dab of hot glue.
- Display: Arrange your fabric-covered pumpkins as a centerpiece or on a mantel.
4. Pumpkin Candle Holders

Create a warm and inviting atmosphere with pumpkin candle holders. These are perfect for a cozy fall evening or a festive dinner table.
Materials:
- Small pumpkins
- Tea light candles
- Craft knife
- Spoon
Instructions:
- Cut the Top: Using a craft knife, cut a circular hole in the top of the pumpkin, slightly larger than the tea light candle.
- Scoop Out: Scoop out a small amount of the pumpkin flesh to create a cavity for the candle.
- Insert Candle: Place the tea light candle into the cavity.
- Light and Enjoy: Light the candle and enjoy the warm glow of your pumpkin candle holder.
5. Decoupage Pumpkins
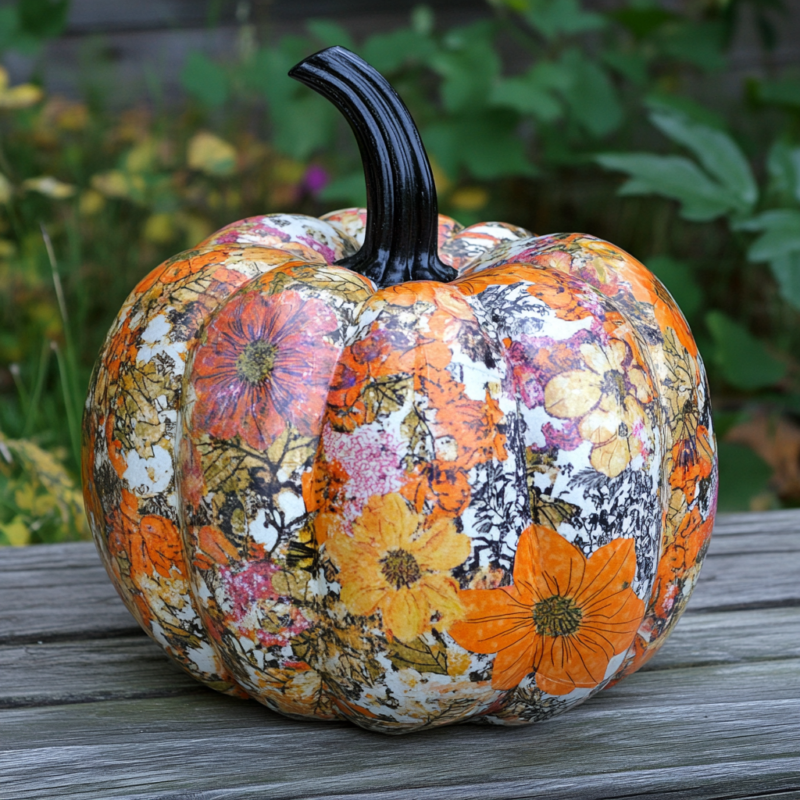
Decoupage pumpkins are a fun and creative way to customize your fall decor with beautiful paper patterns and designs.
Materials:
- Small to medium-sized pumpkins
- Decorative paper or napkins
- Mod Podge
- Paintbrush
- Scissors
Instructions:
- Cut Paper: Cut your decorative paper or napkins into small pieces or shapes.
- Apply Mod Podge: Using a paintbrush, apply a layer of Mod Podge to a section of the pumpkin.
- Attach Paper: Place a piece of paper onto the glued area and smooth it down.
- Seal with Mod Podge: Apply another layer of Mod Podge over the paper to seal it. Repeat this process until the entire pumpkin is covered.
- Dry: Allow the pumpkin to dry completely before displaying.
6. Pumpkin String Art

Create a beautiful piece of fall art with string and nails. This craft is perfect for adding a rustic and artistic touch to your home decor.
Materials:
- Small wooden board
- Small pumpkin
- Nails
- Hammer
- Embroidery thread or thin yarn (orange, green, and brown)
- Pencil
Instructions:
- Draw the Design: Place the pumpkin on the wooden board and trace around it with a pencil.
- Hammer the Nails: Hammer nails along the outline of the pumpkin, spacing them about 1/2 inch apart.
- String the Outline: Tie the end of the orange thread to one nail, then weave the thread back and forth between the nails, filling in the pumpkin shape.
- Add Details: Use green thread for the stem and brown thread for any additional details like leaves.
- Finish: Tie off the thread and trim any excess. Your string art pumpkin is ready to display!
7. Pumpkin Succulent Centerpiece
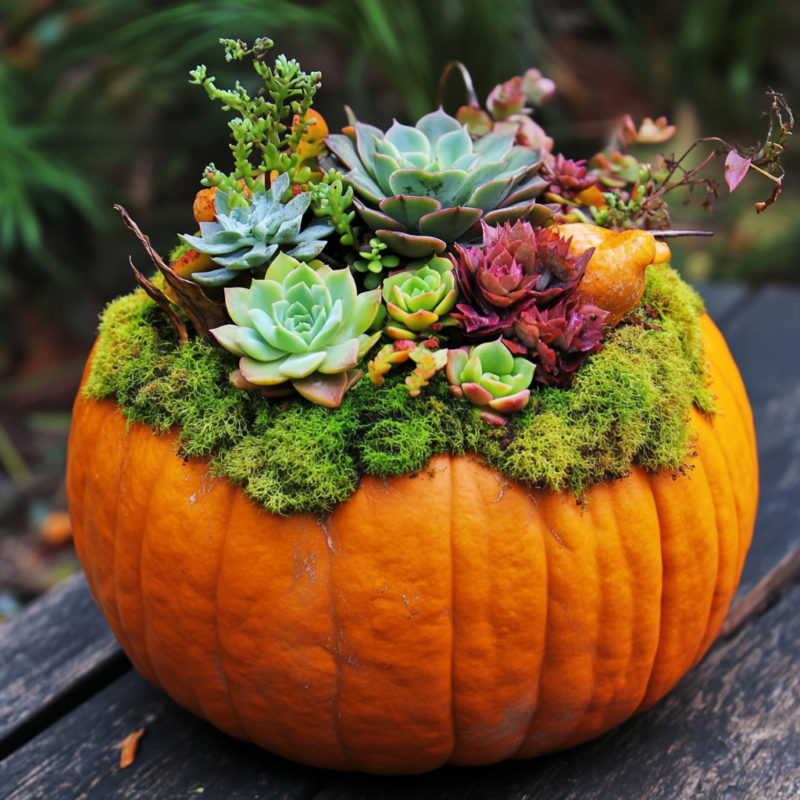
Combine the beauty of pumpkins and succulents for a stunning fall centerpiece. This craft is perfect for a dining table or coffee table.
Materials:
- Small to medium-sized pumpkin
- Succulent cuttings
- Moss
- Hot glue gun and glue sticks
- Craft knife
- Spoon
Instructions:
- Cut the Top: Using a craft knife, cut off the top of the pumpkin and scoop out the seeds and pulp with a spoon.
- Add Moss: Fill the hollowed pumpkin with a layer of moss to help hold the succulents in place.
- Arrange Succulents: Insert succulent cuttings into the moss, arranging them as desired.
- Secure with Glue: Use a hot glue gun to secure the succulents in place if needed.
- Display: Place your succulent pumpkin centerpiece on your table and enjoy!
8. Pumpkin Terrarium
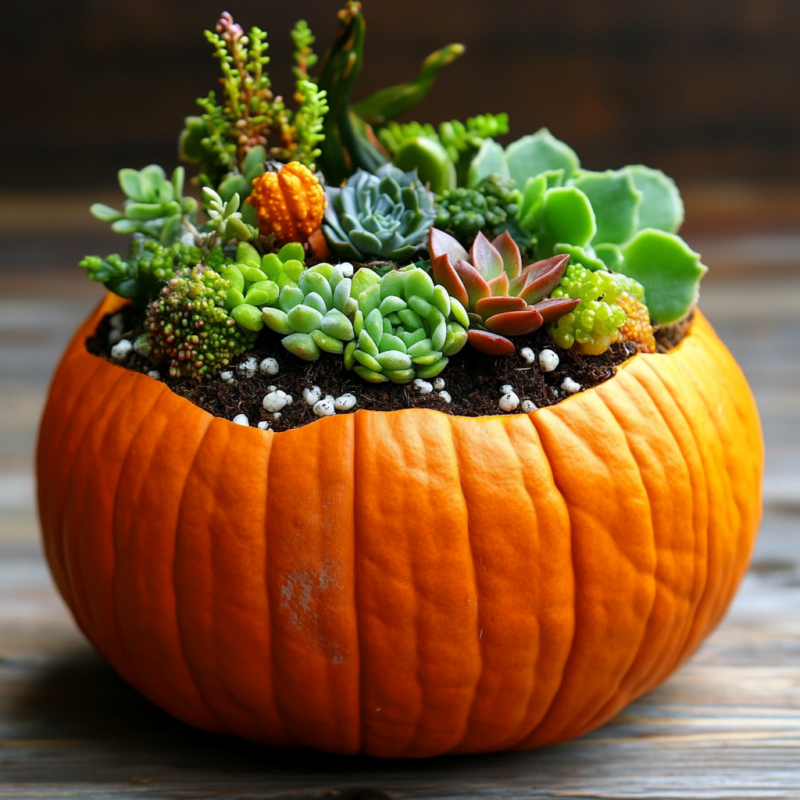
Create a miniature garden inside a pumpkin with this terrarium craft. It’s a delightful way to bring a bit of nature indoors.
Materials:
- Small to medium-sized pumpkin
- Small plants or succulents
- Potting soil
- Pebbles
- Activated charcoal (optional)
- Craft knife
- Spoon
Instructions:
- Cut the Top: Using a craft knife, cut off the top of the pumpkin and scoop out the seeds and pulp.
- Layer Pebbles: Add a layer of pebbles to the bottom of the pumpkin for drainage.
- Add Charcoal: If using, add a thin layer of activated charcoal to help with odor control.
- Fill with Soil: Add potting soil on top of the pebbles and charcoal.
- Plant: Insert your small plants or succulents into the soil, arranging them as desired.
- Water and Display: Lightly water your terrarium and place it in a spot with indirect sunlight.
9. Pumpkin Spice Soap
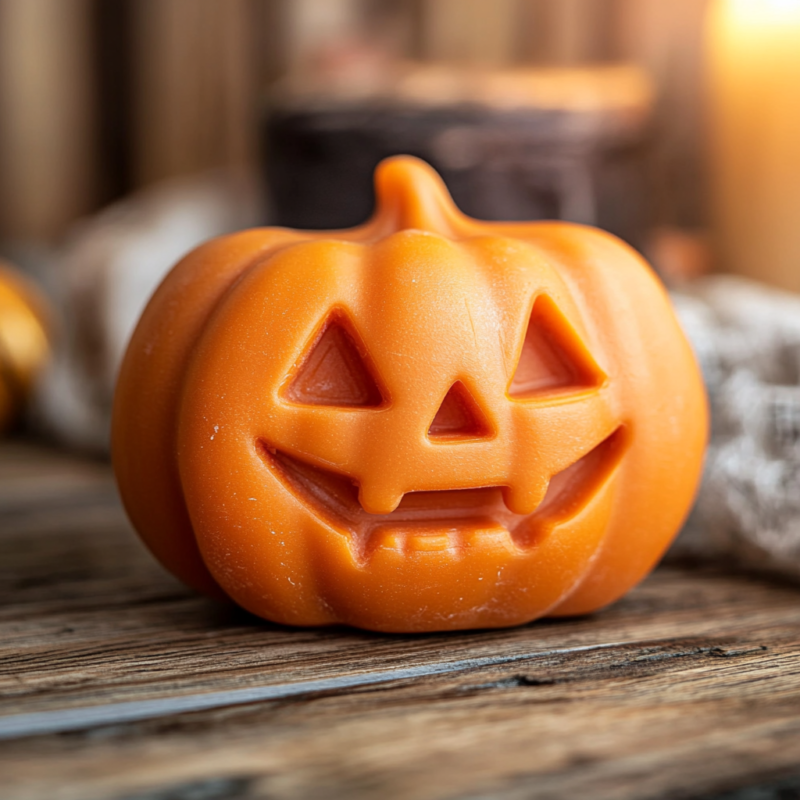
Make your own pumpkin spice-scented soap bars for a cozy and fragrant addition to your bathroom or as a thoughtful gift.
Materials:
- Melt and pour soap base
- Pumpkin spice fragrance oil
- Soap mold
- Orange soap dye (optional)
- Microwave-safe bowl
- Stirring stick
Instructions:
- Melt the Soap Base: Cut the soap base into small pieces and melt it in a microwave-safe bowl in 30-second intervals until fully melted.
- Add Fragrance: Stir in a few drops of pumpkin spice fragrance oil and orange soap dye if desired.
- Pour into Mold: Pour the melted soap mixture into the soap mold.
- Let it Set: Allow the soap to cool and harden completely, which may take a few hours.
- Remove from Mold: Once set, remove the soap bars from the mold and enjoy!
10. Pumpkin Spice Potpourri
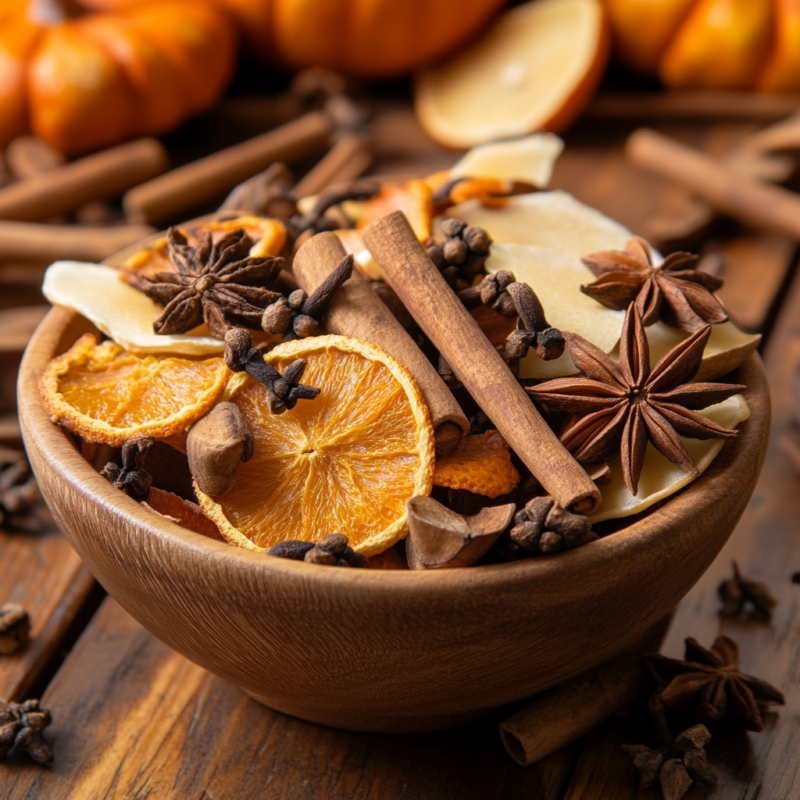
Create a delightful pumpkin spice potpourri to fill your home with the warm and inviting scents of fall.
Materials:
- Dried pumpkin slices or small decorative pumpkins
- Cinnamon sticks
- Whole cloves
- Star anise
- Dried orange slices
- Essential oils (pumpkin spice or cinnamon)
- Large bowl
- Airtight container
Instructions:
- Combine Ingredients: In a large bowl, combine dried pumpkin slices, cinnamon sticks, whole cloves, star anise, and dried orange slices.
- Add Essential Oils: Add a few drops of pumpkin spice or cinnamon essential oil to the mixture and stir gently.
- Store: Transfer the potpourri to an airtight container to allow the scents to meld together.
- Display: Place the potpourri in decorative bowls around your home to enjoy the fall fragrance.
11. Pumpkin Wine Cork Art

Repurpose wine corks to create a charming pumpkin decoration. This eco-friendly craft is perfect for wine lovers and adds a rustic touch to your fall decor.
Materials:
- Wine corks (about 25-30)
- Orange and green acrylic paint
- Paintbrushes
- Hot glue gun and glue sticks
- Green pipe cleaner
- Scissors
Instructions:
- Paint the Corks: Paint the wine corks orange and let them dry completely. Paint a few corks green for the stem.
- Assemble the Pumpkin: Arrange the orange corks in a circular shape, stacking them to form a pumpkin. Use hot glue to secure them together.
- Add the Stem: Glue the green corks on top to create the stem.
- Add Vines: Cut a green pipe cleaner into small pieces and twist them around a pencil to create curly vines. Glue these around the stem.
- Display: Place your wine cork pumpkin on a shelf or table.
12. Pumpkin Macrame Hanger
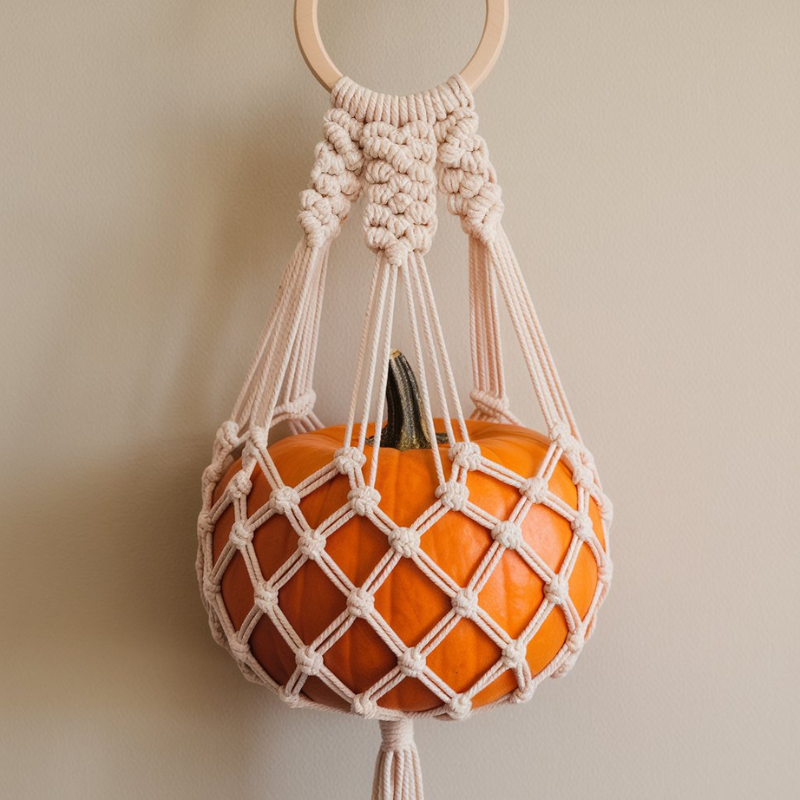
Combine the boho-chic style of macrame with the autumnal charm of pumpkins to create a unique hanging decoration.
Materials:
- Small pumpkin
- Macrame cord
- Scissors
- Wooden ring
- Tape measure
Instructions:
- Cut the Cord: Cut several pieces of macrame cord, each about 3 feet long.
- Attach to Ring: Fold each piece of cord in half and loop them through the wooden ring, securing them with a lark’s head knot.
- Create Knots: Divide the cords into groups and create square knots, leaving enough space to accommodate the pumpkin.
- Form the Hanger: Continue knotting until you have a net-like structure that can hold the pumpkin securely.
- Insert the Pumpkin: Place the pumpkin inside the macrame hanger and adjust the cords as needed.
- Hang: Hang your macrame pumpkin hanger in a desired location.
13. Pumpkin Spice Bath Bombs

Indulge in a relaxing bath with homemade pumpkin spice bath bombs. These make great gifts or a treat for yourself.
Materials:
- Baking soda (1 cup)
- Citric acid (1/2 cup)
- Cornstarch (1/2 cup)
- Epsom salts (1/2 cup)
- Pumpkin spice fragrance oil
- Orange food coloring (optional)
- Water
- Mixing bowl
- Pumpkin bath bomb molds
Instructions:
- Mix Dry Ingredients: In a mixing bowl, combine baking soda, citric acid, cornstarch, and Epsom salts.
- Add Fragrance and Color: Add a few drops of pumpkin spice fragrance oil and orange food coloring if desired.
- Spritz with Water: Lightly spritz the mixture with water, stirring constantly until it holds together when pressed.
- Mold the Bath Bombs: Pack the mixture into bath bomb molds and press firmly.
- Dry: Allow the bath bombs to dry in the molds for at least 24 hours.
- Use: Drop a bath bomb into your bath for a fragrant and relaxing experience.
14. Pumpkin Embroidery Hoop Art

Create a beautiful piece of wall art with an embroidery hoop and fabric, featuring a pumpkin design.
Materials:
- Embroidery hoop
- Fabric (fall-themed or plain)
- Embroidery thread (various colors)
- Embroidery needle
- Scissors
- Pencil
Instructions:
- Prepare the Hoop: Stretch the fabric tightly over the embroidery hoop and secure it.
- Draw the Design: Lightly sketch a pumpkin design on the fabric with a pencil.
- Embroidery: Use embroidery thread and needle to stitch the pumpkin design, using different stitches for texture and detail.
- Finish: Once the design is complete, trim any excess fabric from the edges of the hoop.
- Hang: Display your pumpkin embroidery hoop art on a wall or use it as part of a gallery display.
15. Pumpkin Yarn Wreath
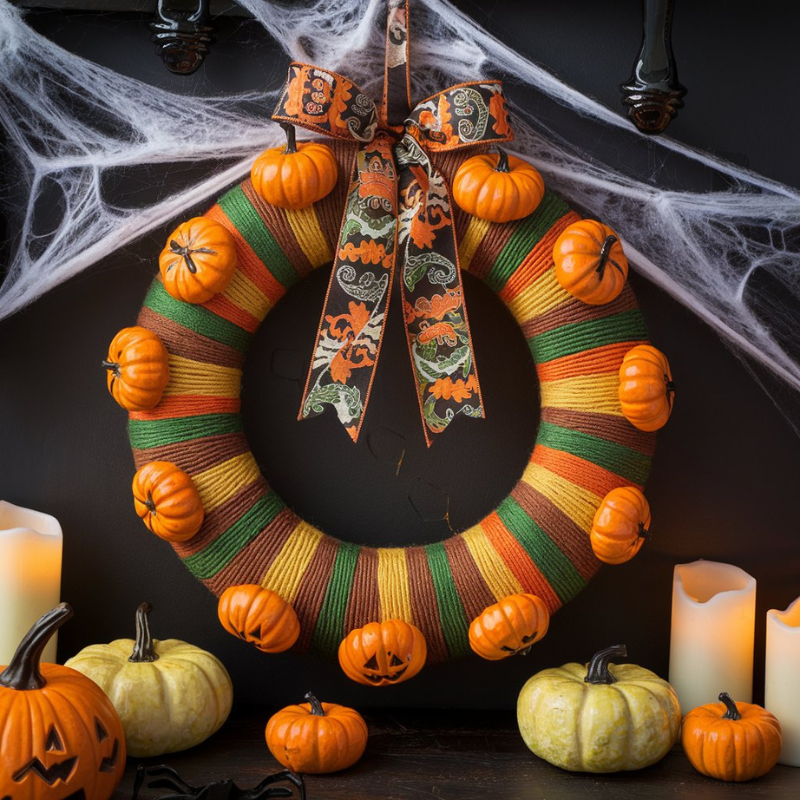
Create a cozy and inviting wreath for your front door using yarn and faux pumpkins. This craft combines the warmth of yarn with the festive feel of pumpkins.
Materials:
- Foam wreath form
- Yarn (orange, green, and brown)
- Faux mini pumpkins
- Hot glue gun and glue sticks
- Scissors
- Decorative ribbon
Instructions:
- Wrap the Wreath Form: Start by wrapping the foam wreath form with orange yarn, securing the ends with hot glue.
- Add Details: Wrap sections of the wreath with green and brown yarn to create a striped effect.
- Attach Pumpkins: Hot glue the faux mini pumpkins onto the wreath, arranging them in a cluster or evenly spaced.
- Add Ribbon: Tie a decorative ribbon around the top of the wreath for hanging.
- Display: Hang your pumpkin yarn wreath on your front door or wall.
16. Pumpkin Mosaic Art

Create a stunning piece of art using mosaic tiles and a pumpkin template. This craft is perfect for adding a touch of elegance to your fall decor.
Materials:
- Wooden or cardboard pumpkin cutout
- Mosaic tiles (various colors)
- Tile adhesive
- Grout
- Spatula
- Sponge
- Paintbrush
- Acrylic paint (optional)
Instructions:
- Prepare the Cutout: If desired, paint the wooden or cardboard pumpkin cutout with a base color and let it dry.
- Apply Adhesive: Spread tile adhesive over a small section of the pumpkin cutout.
- Place Tiles: Press mosaic tiles into the adhesive, creating a pattern or random design. Continue until the entire cutout is covered.
- Grout the Tiles: Once the adhesive is dry, spread grout over the tiles with a spatula, filling in the gaps.
- Clean Tiles: Use a damp sponge to wipe away excess grout from the surface of the tiles.
- Dry and Display: Allow the grout to dry completely before displaying your pumpkin mosaic art.
17. Pumpkin Spice Candle
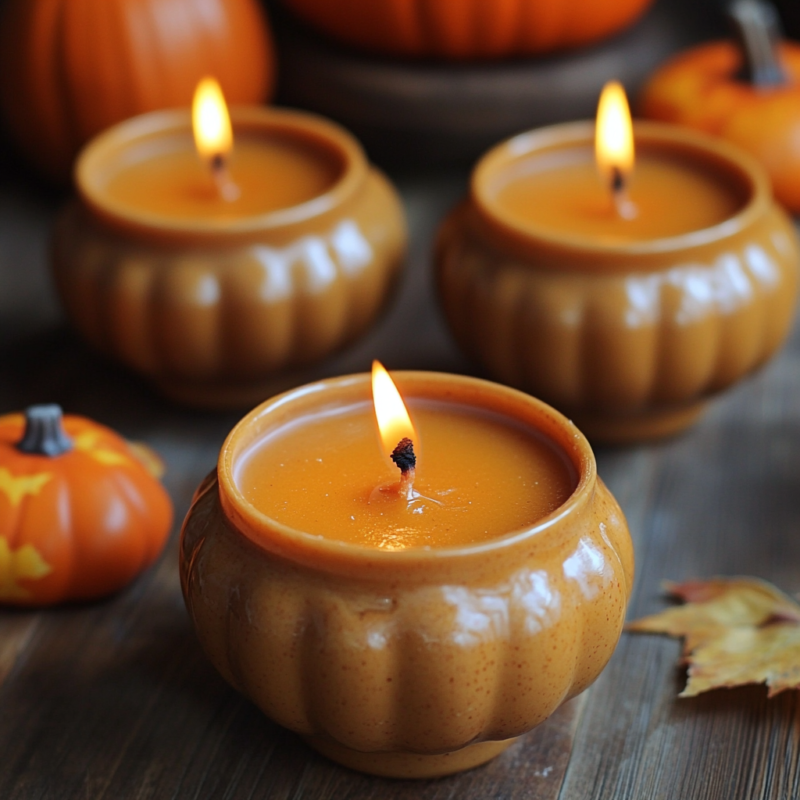
Make your own pumpkin spice-scented candles to fill your home with the cozy aroma of fall. These candles also make great gifts.
Materials:
- Soy wax flakes
- Pumpkin spice fragrance oil
- Candle wicks
- Candle containers (mason jars, tins, etc.)
- Double boiler
- Stirring stick
- Thermometer
- Hot glue gun
Instructions:
- Prepare Containers: Use hot glue to secure a candle wick to the bottom of each container.
- Melt Wax: Melt the soy wax flakes in a double boiler, stirring occasionally.
- Add Fragrance: Once the wax reaches about 185°F, remove it from heat and stir in the pumpkin spice fragrance oil.
- Pour Wax: Carefully pour the melted wax into the prepared containers, holding the wick upright.
- Cool: Allow the candles to cool and harden completely.
- Trim Wicks: Trim the wicks to about 1/4 inch before lighting.
- Enjoy: Light your pumpkin spice candles and enjoy the cozy scent.
18. Pumpkin Button Art

Create a charming piece of art using buttons to form a pumpkin shape. This craft is a fun way to use up spare buttons and adds a whimsical touch to your decor.
Materials:
- Canvas or thick paper
- Orange, green, and brown buttons
- Glue
- Pencil
- Frame (optional)
Instructions:
- Draw the Outline: Lightly sketch a pumpkin shape on the canvas or paper with a pencil.
- Arrange Buttons: Arrange orange buttons inside the pumpkin outline, green buttons for the stem, and brown buttons for any additional details.
- Glue Buttons: Once you’re satisfied with the arrangement, glue the buttons in place.
- Dry: Allow the glue to dry completely.
- Frame (Optional): Place the finished button art in a frame if desired.
- Display: Hang your pumpkin button art on a wall or place it on a shelf.
19. Pumpkin Spice Sugar Scrub
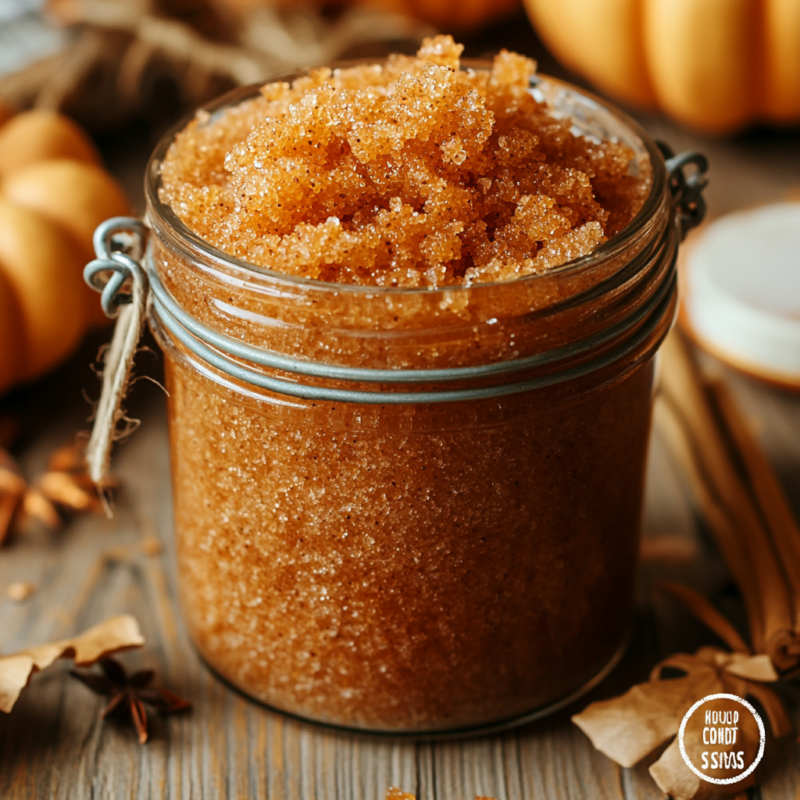
Pamper yourself with a homemade pumpkin spice sugar scrub. This exfoliating scrub is perfect for fall and makes a lovely gift.
Materials:
- Brown sugar (1 cup)
- White sugar (1 cup)
- Coconut oil (1/2 cup)
- Pumpkin spice (1 tsp)
- Vitamin E oil (optional)
- Mixing bowl
- Spoon
- Mason jar or airtight container
Instructions:
- Mix Sugars: In a mixing bowl, combine brown sugar and white sugar.
- Add Coconut Oil: Melt the coconut oil if solid, then mix it into the sugar until well combined.
- Add Spice: Stir in the pumpkin spice and a few drops of vitamin E oil if using.
- Store: Transfer the sugar scrub to a mason jar or airtight container.
- Use: To use, apply the scrub to damp skin and gently massage in circular motions, then rinse off with warm water.
For me, crafting is more than just a hobby – it’s a way to express my creativity, relax, and connect with the season. I find crafting so therapeutic, it really works wonders for my mental health when I’m going through a tough time.
These pumpkin crafts can serve as a warm reminder of the beauty and coziness that fall brings. So, keep your crafting supplies handy and let your imagination continue to flourish. Happy crafting, and may your home be filled with the warmth and charm of your handmade pumpkin treasures!