Homemade Easter Chocolate Bark That’s Perfect for Gifting
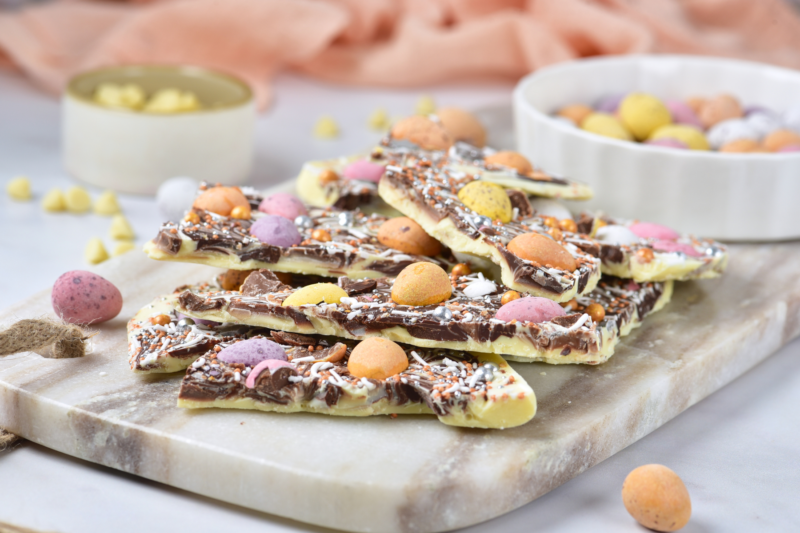
If you’re looking for an Easter treat that feels festive without turning your kitchen into a full-on baking zone, this one’s going to be right up your alley. I love recipes that look cute, feel special, and don’t require me to juggle timers or wash a mountain of dishes. This chocolate bark checks all those boxes and then some. It’s colorful, fun, and basically impossible to mess up, which is always a win in my book.
This is the kind of recipe that’s perfect for those in-between moments. Maybe you need a quick Easter dessert, a fun treat to make with the kids, or something sweet to pop into little gift bags. The swirling, the sprinkling, and the mini eggs on top make it feel like a mini craft project and dessert all rolled into one. Plus, watching it set in the fridge is way more relaxing than hovering over an oven.
I also love how flexible this one is. You can keep it simple or go all out depending on what’s hiding in your candy stash. Leftover Easter chocolate, extra sprinkles, or a mix of white and dark chocolate all work beautifully here. Once it’s set, just break it into pieces and try not to snack on too much before it ever makes it to the table. It happens every single time.
Make sure you also take a look at some of my other Easter recipes here too!
Why We Love This Recipe
- It’s ridiculously easy. No oven, no fancy equipment, and barely any prep. Melt, swirl, sprinkle, and let the fridge do the hard work.
- It looks way more impressive than it actually is. Those swirls and colorful mini eggs make it feel bakery-worthy with almost zero effort.
- Perfect for using up Easter candy. A handful of leftover mini eggs turns into something fun instead of sitting forgotten in the cupboard.
- Kids love helping with this one. Letting them sprinkle and decorate makes it feel like a fun Easter activity, not just another recipe.
- Totally customizable. Swap the sprinkles, change up the chocolate, or add extra candy depending on what you have on hand.
- Great for gifting and sharing. Break it into pieces, wrap it up, and you’ve got an easy homemade treat that feels thoughtful and festive.
- That sweet-and-rich combo just works. Creamy white chocolate, swirls of dark chocolate, and crunchy mini eggs in every bite.

Equipment
-
Microwave-safe bowls: You’ll need a couple of these for melting the white and dark chocolate without any extra mess.
-
Microwave: This makes melting the chocolate quick and easy, with no need to babysit a stovetop.
-
Spoon or silicone spatula: Perfect for stirring the chocolate until smooth and spreading it out evenly on the pan.
-
Baking sheet: This gives you plenty of space to spread the chocolate into a nice even layer.
-
Parchment paper or foil: Lining the pan keeps the bark from sticking and makes cleanup super simple.
-
Toothpick or skewer: This is what you’ll use to gently swirl the chocolates together for that pretty marbled look.
-
Sharp knife (optional): Handy if you prefer neat slices instead of breaking the bark into rustic pieces.
-
Refrigerator: A little fridge time is all it takes to set everything up perfectly.
Ingredients
-
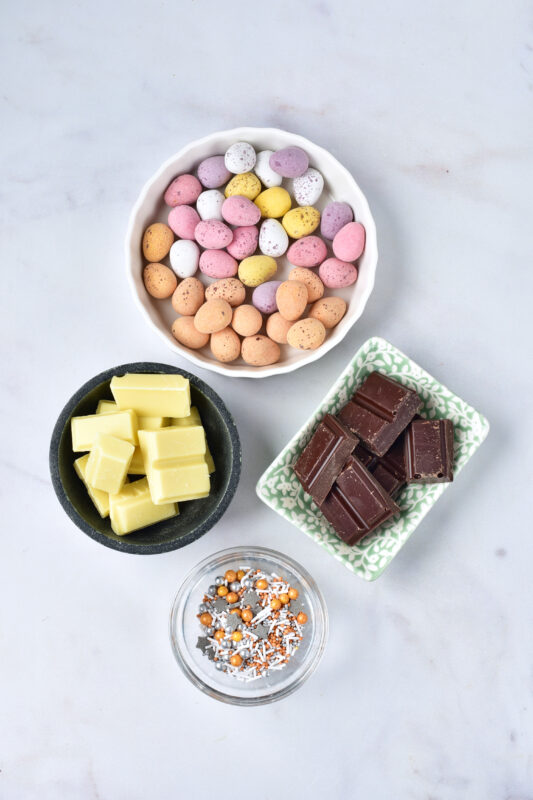
1 cup mini chocolate eggs: These add the perfect crunch and that classic Easter look, plus they make the bark extra fun to decorate.
-
1 cup broken white chocolate (about 1 lb): This is the creamy base that holds everything together and gives the bark its sweet, smooth bite.
-
1/3 cup broken dark chocolate (about 1/3 lb): A little dark chocolate swirl adds just enough richness to balance out the sweetness.
-
3 tablespoons sprinkles: These bring the color, the fun, and that festive finishing touch that makes the bark feel extra special.
Recipe Instructions
You can find a printable recipe card at the bottom of this post.
Step 1: Slice about half of the chocolate eggs into halves or quarters, leaving the remaining eggs whole for decorating.

Step 2: Add the white chocolate to a microwave-safe bowl and heat in 30-second bursts, stirring after each round, until fully melted and smooth. Set aside to cool slightly.
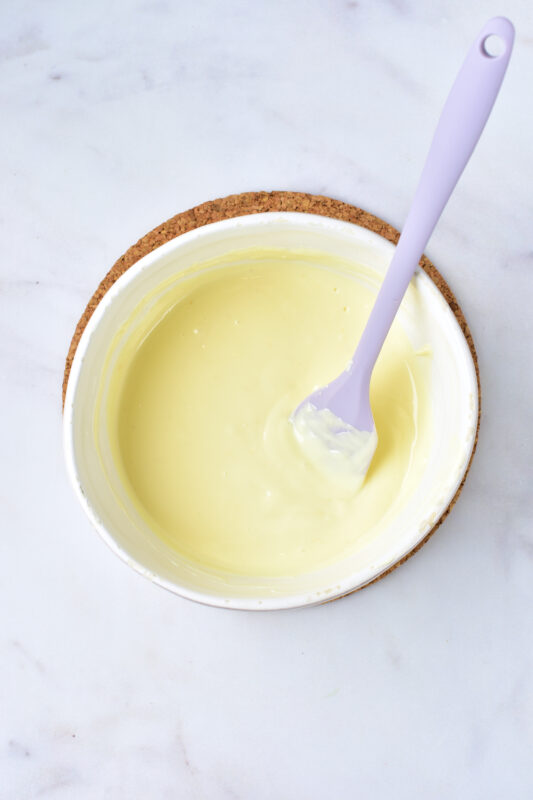
Step 3: Melt the dark chocolate the same way, heating in short intervals and stirring well until smooth with no lumps.

Step 4: Line a baking sheet with parchment paper or foil. Pour the melted white chocolate onto the pan and spread it into an even layer. Drizzle the melted dark chocolate over the top, then use a toothpick to gently swirl the two together.

Step 5: Scatter the whole chocolate eggs over the surface, then add the chopped eggs and sprinkles.
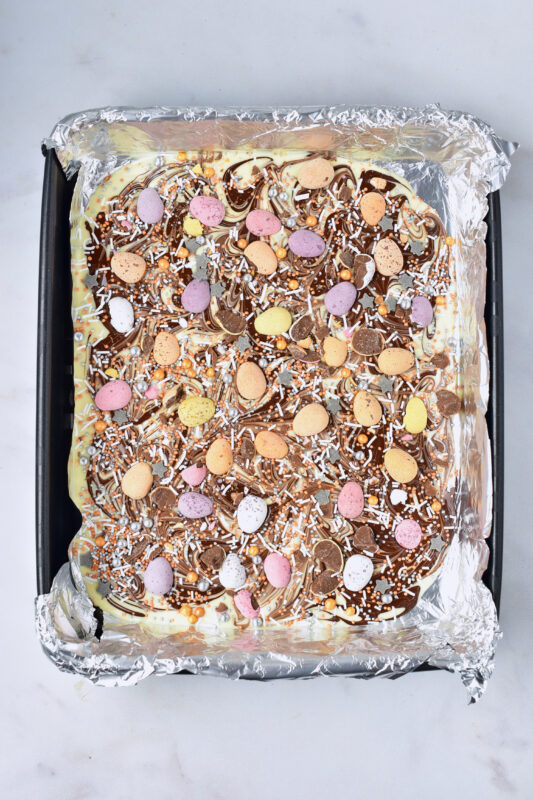
Step 6: Refrigerate for about 2 hours, or until completely set. Once firm, break into pieces by hand or slice with a knife.


Serving & Storing
-
Serve it straight from the fridge or at room temperature. It’s firm and snappy when chilled, but softens just enough if you let it sit out for a few minutes.
-
Break or slice into pieces. Go rustic and snap it by hand, or use a sharp knife if you want cleaner, gift-worthy pieces.
-
Perfect for sharing. Pile it onto a platter for Easter dessert tables or tuck a few pieces into treat bags for gifting.
-
Store in an airtight container. Keep it in the fridge to prevent melting, especially if your kitchen runs warm.
-
Layer with parchment paper. This keeps the pieces from sticking together and helps everything stay neat.
-
Best enjoyed within a week. It’ll still be safe after that, but the chocolate and decorations look and taste best when it’s fresh.

Variations & Substitutions
-
Switch up the chocolate. Use all white chocolate, all milk chocolate, or a mix of whatever you have on hand. This recipe is very forgiving.
-
Try different Easter candy. Mini eggs are great, but chopped chocolate bunnies, pastel M&M’s, or candy-coated chocolates work just as well.
-
Go sprinkle-free if needed. The bark still looks festive with just the chocolate eggs if sprinkles aren’t your thing.
-
Add a little crunch. Toss on chopped pretzels, crushed biscuits, or a handful of nuts for extra texture.
-
Make it kid-friendly or allergy-aware. Choose nut-free chocolate and decorations if you’re serving this to a crowd.
-
Change the colors for other holidays. Swap the sprinkles and candy to turn this into a Christmas, Valentine’s, or birthday bark. Make sure you also take a look at my recipe for Halloween Bark too.

Little Tricks That Make a Big Difference
-
Let the melted chocolate cool slightly before pouring. If it’s too hot, the layers can blend together instead of giving you those pretty swirls.
-
Use a light hand when swirling. A few gentle passes with a toothpick is all you need. Overdoing it can muddy the colors.
-
Press the toppings in gently. This helps the mini eggs and sprinkles stick once the bark sets instead of falling off later.
-
Line the pan really well. Make sure the parchment or foil covers the edges so the bark lifts off easily once it’s firm.
-
Spread the chocolate evenly. A quick smooth-out with a spatula helps everything set at the same rate.
-
Chill on a flat surface. This keeps the bark level so it sets up nice and even instead of sliding to one side.

FAQs
Can I use milk chocolate instead of dark chocolate?
Absolutely. Milk chocolate works just fine if that’s what you prefer or already have on hand. It’ll make the bark a little sweeter, but still delicious.
Do I have to use mini chocolate eggs?
Not at all. They’re fun and festive, but you can swap them for any Easter candy you like or even leave them off and just use sprinkles.
Why did my chocolate look grainy when it melted?
This usually happens if the chocolate gets too hot or comes into contact with moisture. Melting in short bursts and stirring well between each one helps prevent that.
Can I make this ahead of time?
Yes, and it’s a great make-ahead treat. You can prepare it a few days in advance and keep it stored in the fridge until you’re ready to serve.
How do I get clean slices instead of breaking it?
Let the bark sit at room temperature for a few minutes, then use a sharp knife to slice. This helps prevent cracking.
Do I need to temper the chocolate?
Nope. Since this bark sets in the fridge, there’s no need to temper the chocolate for this recipe.
How long does Easter chocolate bark last?
Stored in an airtight container in the fridge, it stays fresh for up to a week, though it usually disappears much sooner.

Easter Chocolate Bark

A quick, no-bake Easter treat that’s as fun to make as it is to eat. This Easter chocolate bark is swirled with creamy white and dark chocolate, topped with mini chocolate eggs and colorful sprinkles, and sets up perfectly in the fridge. It’s an easy, festive dessert that’s perfect for sharing, gifting, or sneaking a piece straight from the fridge.
Ingredients
- 1 cup mini chocolate eggs
- 1 cup broken white chocolate (about 1 lb)
- 1/3 cup broken dark chocolate (about 1/3 lb)
- 3 tbsp sprinkles
Instructions
- Slice about half of the chocolate eggs into halves or quarters, leaving the remaining eggs whole for decorating.
- Add the white chocolate to a microwave-safe bowl and heat in 30-second bursts, stirring after each round, until fully melted and smooth. Set aside to cool slightly.
- Melt the dark chocolate the same way, heating in short intervals and stirring well until smooth with no lumps.
- Line a baking sheet with parchment paper or foil. Pour the melted white chocolate onto the pan and spread it into an even layer. Drizzle the melted dark chocolate over the top, then use a toothpick to gently swirl the two together.
- Scatter the whole chocolate eggs over the surface, then add the chopped eggs and sprinkles.
- Refrigerate for about 2 hours, or until completely set. Once firm, break into pieces by hand or slice with a knife.
Notes
- Melt the chocolate slowly in short bursts, stirring well each time, to keep it smooth and easy to work with.
- Let the melted chocolate cool slightly before pouring so the swirls stay defined instead of blending together.
- Press the mini eggs and sprinkles gently into the chocolate so they stick once the bark sets.
- Line the baking sheet well with parchment paper or foil to make lifting and breaking the bark easier.
- For cleaner slices, let the bark sit at room temperature for a few minutes before cutting with a sharp knife.
- Store leftovers in an airtight container in the fridge to prevent the chocolate from softening or melting.
Nutrition Information:
Yield:
12Serving Size:
1Amount Per Serving: Calories: 271Total Fat: 13gSaturated Fat: 7gUnsaturated Fat: 6gCholesterol: 7mgSodium: 33mgCarbohydrates: 35gFiber: 1gSugar: 29gProtein: 2g