Simple Homemade Carnitas Burritos with All Your Favorite Fillings
There are some nights when you just need something filling, easy, and guaranteed to keep everyone happy at the table. That’s exactly where these carnitas burritos come in. I love having a meal like this in my back pocket, especially on those busy evenings when everyone’s hungry and I don’t want to spend hours in the kitchen.
What makes these so handy is how they turn simple ingredients into something that feels a little more special. If you’ve got leftover carnitas, you’re already halfway there, and the rest is just layering up rice, beans, cheese, and whatever toppings you’ve got on hand. It’s one of those meals that looks generous and satisfying without costing a fortune, which always feels like a win.
Around here, I usually lay everything out and let everyone build their own. It keeps things relaxed and means each person gets exactly what they like, which saves a lot of complaints. And if you’ve got a few extra minutes to crisp them up in the pan, that golden outside makes them feel like something you’d order out, only much more budget friendly.
Why We Love This Recipe
- Great for using leftovers: You can turn leftover carnitas into a completely new meal, which helps stretch your grocery budget without anyone feeling like they’re eating the same thing again.
- Filling and satisfying: With rice, beans, and all those hearty toppings, these burritos actually keep everyone full, which means fewer snack requests later.
- Easy to customize for everyone: You can set everything out and let each person build their own, so picky eaters stay happy and there’s less mealtime fuss.
- Simple ingredients you probably have: Most of these are pantry and fridge staples, so you won’t need a special shop to get dinner on the table.
- Quick enough for busy nights: Once the meat is ready, everything comes together fast, which is exactly what you need when the evening feels a bit rushed.
- That crispy finish makes it feel special: Taking a couple of extra minutes to crisp them up gives you that golden outside that makes it taste like a treat without the takeaway price.
Equipment
- Large skillet: This is what you’ll use to heat and crisp up the carnitas, and it’s also perfect if you want to give the burritos that golden, crispy finish.
- Medium saucepan: Handy for warming the rice and beans so everything is nice and hot when you’re ready to assemble.
- Mixing spoon or spatula: You’ll need this for stirring the meat and keeping everything evenly heated without sticking.
- Knife: A good sharp knife makes quick work of slicing the avocado and chopping the cilantro.
- Cutting board: Keeps everything neat and gives you a safe place to prep your toppings.
- Measuring cups: Helpful for portioning out the fillings so each burrito gets a nice, even amount.
- Tongs or spatula for flipping: Makes it much easier to turn the burritos in the pan without them falling apart.
- Serving plates or a large platter: Great for laying everything out so everyone can build their own burrito without any fuss.

Ingredients
- 2–3 cups store-bought or leftover carnitas This is a great way to use up leftovers or grab something ready-made to keep dinner quick and budget friendly.
- 4 large flour tortillas Soft tortillas hold everything together and make these nice and filling for hungry kids and grown-ups alike.
- 2 cups cooked white or cilantro-lime rice Adds bulk to the burritos so they’re more satisfying without needing extra meat.
- 1 cup black beans or pinto beans, drained and warmed Beans are an easy, affordable way to stretch the filling and add a bit of extra protein.
- 1 cup shredded Monterey Jack or cheddar cheese Melty cheese brings everything together and adds that cozy, comforting flavor everyone loves.
- 1/2 cup salsa or pico de gallo This adds a fresh, zesty bite that keeps the burritos from feeling too heavy.
- 1/2 cup sour cream A little sour cream makes each bite creamy and helps balance out the flavors.
- 1 avocado, sliced Sliced avocado adds a bit of richness and makes these feel just a little more special.
- 1/4 cup chopped fresh cilantro A sprinkle of cilantro brightens everything up and adds a fresh finish.
- 1 tablespoon olive oil (optional, for crisping burritos) Just a small amount helps you get that golden, crispy outside if you have a few extra minutes.
- Salt and pepper to taste Simple seasoning helps bring all the flavors together just right.
- Lime wedges, for serving A squeeze of lime at the end lifts everything and adds a nice fresh touch.

Recipe Instructions
You can find a printable recipe card at the bottom of this post.
Step 1: Heat the carnitas in a skillet over medium heat until warmed through. If you want crispy edges, spread the meat out in an even layer and let it cook undisturbed for a few minutes before stirring. Add salt and pepper to taste if needed.
Step 2: Warm the tortillas in a dry skillet or microwave until they’re soft and easy to fold. Lay each tortilla flat and add about 1/2 cup of rice to the center.

Step 3: Layer the fillings by adding beans, carnitas, shredded cheese, salsa, sour cream, avocado slices, and a sprinkle of cilantro.


Step 4: Roll the burritos by folding in the sides, then rolling tightly from the bottom up to seal everything inside.

Step 5: Crisp the outside (optional) by heating a little olive oil in a skillet over medium heat. Place the burritos seam-side down and cook for 2–3 minutes per side until golden.
Step 6: Serve warm with lime wedges on the side.

Serving & Storing
- Serve them hot for the best texture: These are at their nicest straight from the pan while the outside is still a little crispy and the cheese is perfectly melted.
- Set up a simple build-your-own station: Putting everything out on the table lets everyone add what they like, which keeps things easy and cuts down on complaints.
- Add a few easy sides if you need to stretch the meal: A simple salad, extra rice, or tortilla chips can help feed more people without much extra cost.
- Wrap leftovers tightly for the fridge: If you’ve got extras, wrap them in foil or store in an airtight container and they’ll keep well for up to 3 days.
- Reheat in a pan or oven if you can: Warming them this way helps bring back that crisp outside, instead of turning soft like they can in the microwave.
- Store fillings separately for flexibility: If you haven’t assembled everything yet, keeping the ingredients separate makes it easy to throw together fresh burritos the next day.

Variations & Substitutions
- Swap the meat if needed: If you don’t have carnitas, shredded chicken, ground beef, or even leftover roast works just as well.
- Use what beans you have on hand: Black beans, pinto beans, or even kidney beans will all do the job, so there’s no need for an extra shop.
- Try brown rice or skip it altogether: Brown rice adds a bit more fiber, or you can leave it out if you want a lighter burrito.
- Make it dairy-free if needed: Just skip the cheese and sour cream or use dairy-free alternatives if that’s what your family prefers.
- Add extra veggies to stretch it further: Corn, peppers, or even leftover roasted veggies are great for bulking things out without spending more.
- Switch up the toppings: Use what you’ve got in the fridge like lettuce, jalapeños, or a drizzle of hot sauce to change things up.
- Turn it into a burrito bowl: If you’re short on tortillas, serve everything over rice in a bowl and you’ve still got a filling, budget-friendly meal.

Little Tricks That Make a Big Difference
- Warm the tortillas first: Just a few seconds in a pan or microwave makes them softer and much easier to roll without tearing.
- Don’t overfill them: It’s tempting to pile everything in, but keeping the filling reasonable makes them easier to roll and keeps everything from spilling out.
- Layer with a little thought: Putting rice down first helps create a base, and adding cheese near the hot ingredients lets it melt nicely.
- Let the carnitas crisp up a bit: Giving the meat a few minutes undisturbed in the pan adds extra flavor and texture that really makes a difference.
- Roll them tightly and seam-side down: This helps everything stay tucked in and makes them much easier to crisp up in the pan.
- Use a hot pan for that golden finish: A properly heated pan helps you get that crispy outside quickly without drying out the filling.
- Finish with a squeeze of lime: It might seem small, but that little bit of freshness really lifts all the flavors.

What to Serve with Carnitas Burritos
- Simple tortilla chips and salsa: This is always an easy win and gives everyone something to snack on while you’re finishing up dinner.
- A quick side salad: Even something basic with lettuce, tomatoes, and a light dressing helps balance out the richness of the burritos.
- Mexican-style rice or extra cilantro-lime rice: Great if you need to stretch the meal a bit further for bigger appetites.
- Refried beans or extra seasoned beans: Adding a small bowl on the side makes the meal feel more filling without costing much more.
- Grilled or sautéed peppers and onions: These add a bit of color and flavor and are a nice way to use up veggies you already have.
- Corn on the cob or simple street corn: Sweet corn pairs really nicely and feels like a treat without much extra effort.
- A bowl of guacamole or sliced avocado: If you’ve got an extra avocado, it’s an easy way to make the meal feel a little more special.

FAQs
Can I make carnitas burritos ahead of time?
Yes, you can assemble them ahead and store them in the fridge for up to 24 hours. If you plan to crisp them, it’s best to do that just before serving so they stay nice and golden.
How do I keep burritos from getting soggy?
Let hot ingredients cool slightly before assembling and avoid adding too much salsa. You can also keep wetter toppings on the side and add them just before eating.
Can I freeze carnitas burritos?
Yes, they freeze well if you leave out the sour cream and avocado. Wrap them tightly in foil or plastic wrap, then store in a freezer bag for up to 2 months.
What’s the best way to reheat burritos?
For the best texture, reheat them in a skillet or oven so the outside crisps back up. The microwave works in a pinch, but they’ll be softer.
Can I use store-bought carnitas?
Absolutely, and it’s a great time-saver. It’s perfect for busy nights when you still want a homemade meal without starting from scratch.
How do I make these burritos healthier?
You can use brown rice, add extra veggies, and go lighter on the cheese and sour cream. It’s an easy recipe to adjust based on what your family prefers.
What kind of tortillas work best for burritos?
Large flour tortillas are the easiest to roll and hold all the fillings well. Warming them first helps prevent tearing.
Can I turn this into a burrito bowl instead?
Yes, just skip the tortillas and serve everything over rice. It’s a great option if you’re out of wraps or want something a bit lighter.
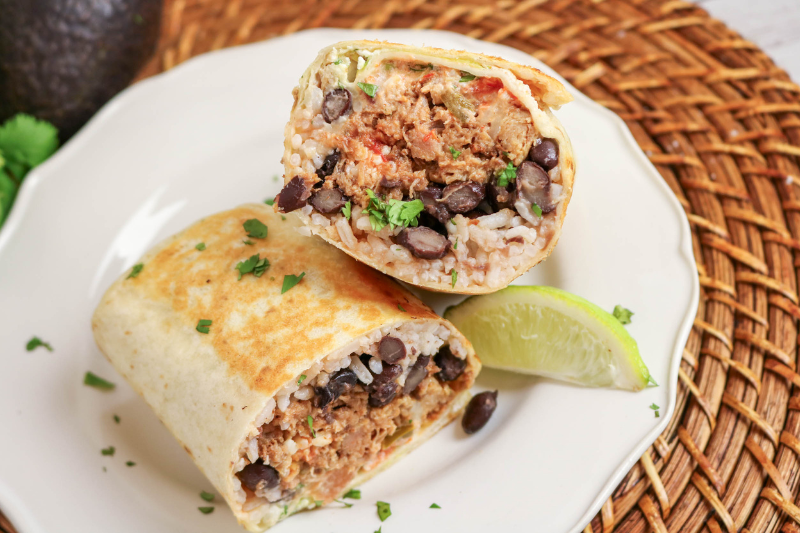
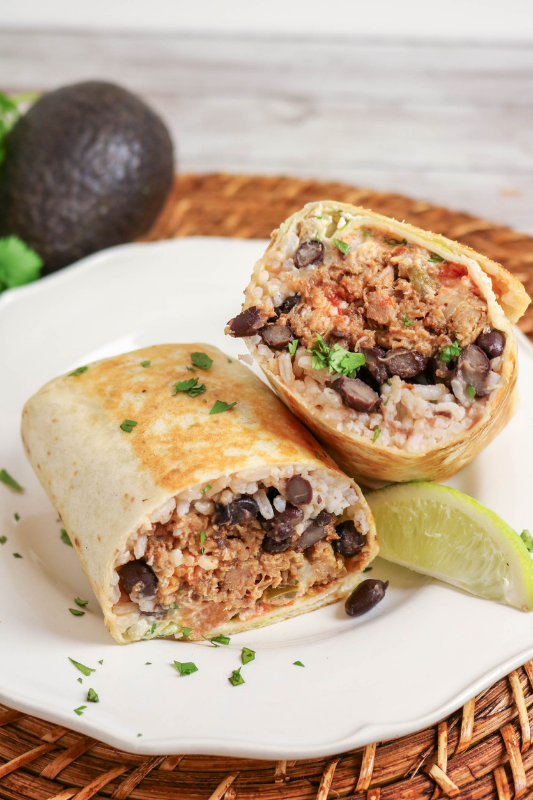
Homemade Carnitas Burritos
Tender, flavorful carnitas wrapped up with rice, beans, cheese, and fresh toppings, these burritos are a simple, filling meal that’s perfect for busy family nights. Easy to customize and great for using leftovers, they come together quickly and can be crisped in the pan for that golden, restaurant-style finish at home.
Ingredients
- 2–3 cups store-bought or leftover carnitas
- 4 large flour tortillas
- 2 cups cooked white or cilantro-lime rice
- 1 cup black beans or pinto beans, drained and warmed
- 1 cup shredded Monterey Jack or cheddar cheese
- 1/2 cup salsa or pico de gallo
- 1/2 cup sour cream
- 1 avocado, sliced
- 1/4 cup chopped fresh cilantro
- 1 tablespoon olive oil (optional, for crisping burritos)
- Salt and pepper to taste
- Lime wedges, for serving
Instructions
- Heat the carnitas in a skillet over medium heat until warmed through. If you want crispy edges, spread the meat out in an even layer and let it cook undisturbed for a few minutes before stirring. Add salt and pepper to taste if needed.
- Warm the tortillas in a dry skillet or microwave until they’re soft and easy to fold. Lay each tortilla flat and add about 1/2 cup of rice to the center.
- Layer the fillings by adding beans, carnitas, shredded cheese, salsa, sour cream, avocado slices, and a sprinkle of cilantro.
- Roll the burritos by folding in the sides, then rolling tightly from the bottom up to seal everything inside.
- Crisp the outside (optional) by heating a little olive oil in a skillet over medium heat. Place the burritos seam-side down and cook for 2–3 minutes per side until golden.
- Serve warm with lime wedges on the side.
Notes
- Warm your tortillas before filling so they’re easier to roll and less likely to tear.
- Don’t overfill the burritos or they’ll be tricky to wrap and may fall apart when cooking.
- If you want crispy edges, let the burritos sit undisturbed in the pan for a couple of minutes before turning.
- Leave out sour cream and avocado if you plan to freeze them, then add fresh when serving.
- Store leftovers wrapped tightly in the fridge for up to 3 days.
- Reheat in a skillet or oven for the best texture, especially if you’ve crisped them.
- This is a great way to use up leftover carnitas or other cooked meats you already have on hand.
Nutrition Information:
Yield:
4Serving Size:
1Amount Per Serving: Calories: 672Total Fat: 39gSaturated Fat: 17gUnsaturated Fat: 22gCholesterol: 75mgSodium: 790mgCarbohydrates: 56gFiber: 14gSugar: 4gProtein: 30g