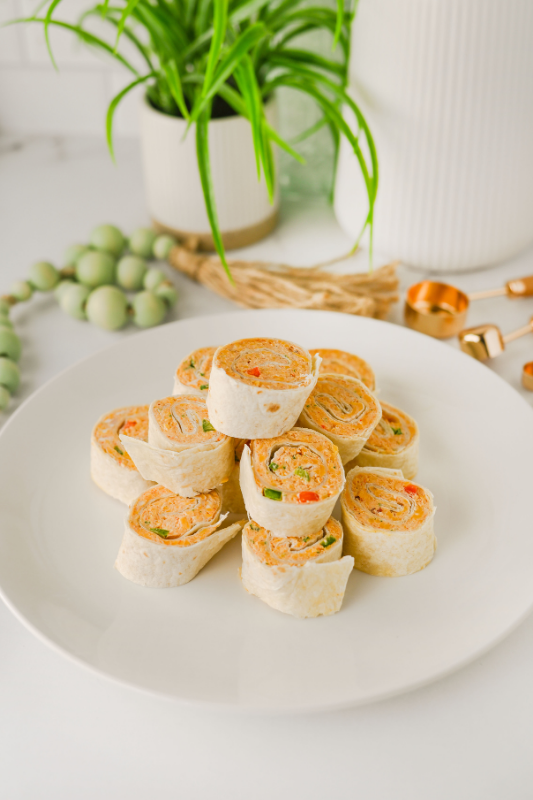
The Easiest Mexican Pinwheels for Parties, Potlucks, and Snacks
I don’t know about you, but I’m always looking for something quick I can pull together when everyone’s hungry and I don’t feel like turning on the oven. Between after-school chaos, laundry piling up, and someone always asking for a snack, I need recipes that just work without a lot of fuss. These Mexican pinwheels have become one of those little lifesavers in my kitchen.
These come together with simple, affordable ingredients you might already have on hand, and they turn into something that feels a bit more fun than the usual sandwich. I’ve made them for lunch, packed them into lunchboxes, and even set them out when we’ve had friends over, and they always go down well.
They’re also easy to make ahead, which takes a bit of pressure off later in the day. I’ll often mix everything up in the morning, pop the rolls in the fridge, and slice them when we’re ready to eat. It’s easy, filling, and just the kind of no-stress food that makes busy family life feel a little more manageable.
Why We Love This Recipe
- Quick to make ahead: You can roll these up earlier in the day and just slice when you need them, which makes busy afternoons so much easier.
- Budget-friendly ingredients: Everything in here is simple and affordable, and it’s a great way to stretch a couple of cans of chicken into something that feeds everyone.
- No cooking required: There’s no oven or stovetop needed, so it’s perfect for those days when you don’t want to heat up the kitchen.
- Easy to customize: You can swap in what you have on hand, like leftover chicken or different veggies, and it still turns out delicious every time.
- Perfect for picky eaters: The creamy filling and mild taco flavor make these really kid-friendly, so they actually get eaten without complaints.
- Great for snacks or parties: Whether it’s lunchboxes, after-school snacks, or a get-together, these always disappear fast and feel a little special without extra effort.
Equipment
- Mixing bowl: A large bowl gives you plenty of room to combine everything without making a mess on the counter.
- Hand mixer: This helps get the filling nice and smooth quickly, which makes spreading so much easier.
- Spatula or wooden spoon: Handy for scraping down the sides of the bowl and making sure everything is well mixed.
- Cutting board: You’ll need a clean space to roll up the tortillas and slice them neatly.
- Sharp knife: A good sharp knife makes it much easier to cut clean, even pinwheels without squashing them.
- Measuring cups and spoons: These keep everything balanced so the flavors come out just right every time.
- Plastic wrap or airtight container: Perfect for chilling the rolls in the fridge and keeping them fresh until you’re ready to serve.

Ingredients
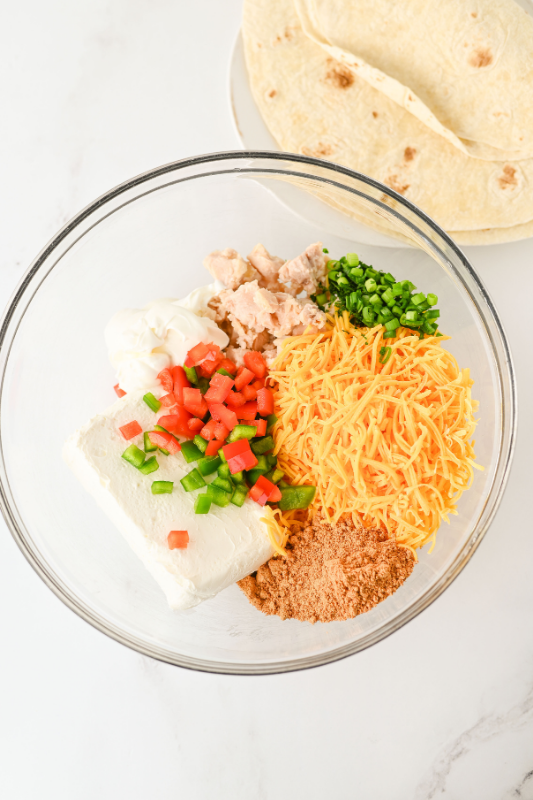
- 8 ounces cream cheese: This gives the filling that rich, creamy base that holds everything together so nicely.
- 1/4 cup sour cream: Adds a little tang and helps loosen the mixture so it spreads easily.
- 2 (4.5 oz.) cans of chunk chicken breast (or 8 ounces of any cooked chicken): A simple, budget-friendly way to add protein and make these filling enough for a proper snack or light meal.
- 1 cup shredded cheddar cheese: Brings in that familiar cheesy flavor that makes these extra comforting and kid-friendly.
- 2 green onions, sliced: Adds a mild onion flavor without being too strong, which works well for the whole family.
- 2 tbsp diced green bell pepper: Gives a bit of crunch and freshness to balance out the creamy filling.
- 2 tbsp diced red bell pepper: Adds a touch of sweetness and a nice pop of color.
- 1 tbsp chopped cilantro: Brightens everything up with a fresh, herby finish.
- 2 tbsp taco seasoning: This is where all that lovely Mexican-inspired flavor comes from, and it saves time using a ready mix.
- 4 burrito tortillas: Soft and flexible, these roll up easily and hold all that filling without tearing.

Recipe Instructions
You can find a printable recipe card at the bottom of this post.
Step 1: Prepare the filling by using a hand mixer to blend the cream cheese, sour cream, chicken, green onions, bell pepper, cilantro, and taco seasoning in a large bowl until smooth and well combined.

Step2: Spread the mixture by taking one tortilla and evenly spreading about 1/4 of the filling over it, leaving about a 1/2-inch border around the edges.

Step 3: Roll the tortilla tightly and set it aside.
Step 4: Repeat the process with the remaining tortillas and filling.

Step 5: Chill the rolls by placing them in the refrigerator for about 1 hour to firm up.
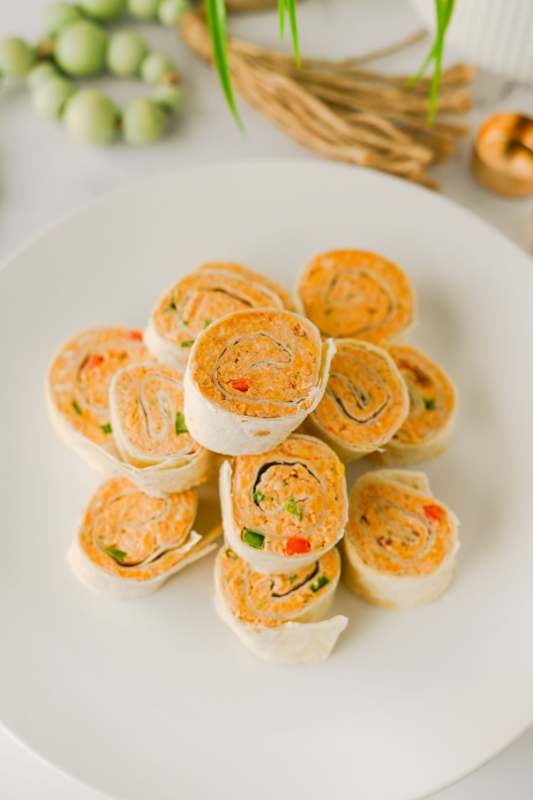
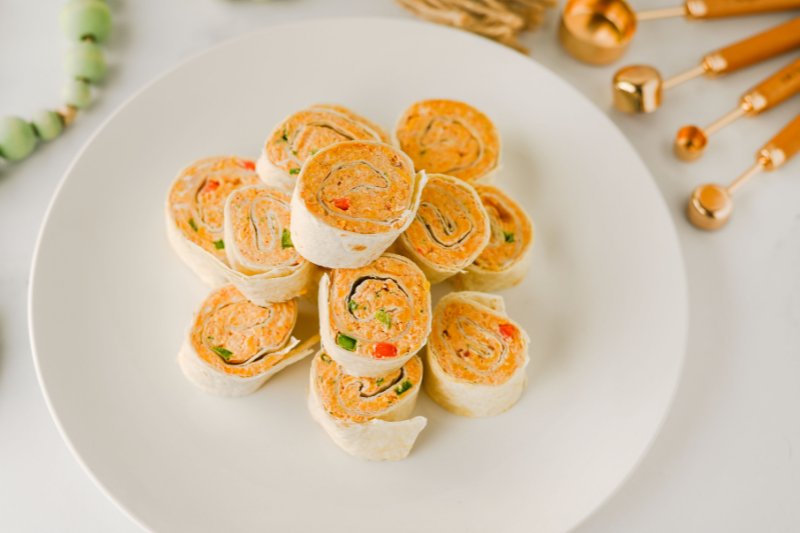
Step 6: Slice and serve by cutting each rolled tortilla into 1 to 1 1/2-inch pinwheels.
Serving & Storing
- Serve chilled for the best texture: These slice up more neatly and hold their shape better after a good chill in the fridge.
- Great for make-ahead snacks: You can prepare them a few hours in advance and keep them covered in the fridge until you’re ready to serve.
- Perfect for lunchboxes or quick bites: I’ll often tuck a few into lunchboxes or keep them on hand for after-school snacks.
- Store leftovers in an airtight container: They’ll keep well in the fridge for up to 3 days and still taste just as good.
- Keep them tightly wrapped: This stops the tortillas from drying out and keeps everything nice and soft.
- Best enjoyed fresh: While they store well, they’re nicest within the first day or two when the texture is at its best.

Variations & Substitutions
- Use leftover chicken: This is a great way to use up roast or rotisserie chicken instead of canned, and it adds a bit more flavor.
- Swap the cheese: You can use Monterey Jack or a Mexican blend if that’s what you have in the fridge, and it melts in just as nicely.
- Adjust the spice level: Add a pinch of chili flakes or a splash of hot sauce if your family likes a bit of heat, or keep it mild for the kids.
- Try different veggies: Finely chopped tomatoes, sweetcorn, or even grated carrot work well if you want to mix things up.
- Use flavored tortillas: Spinach or tomato tortillas add a little extra color and make them feel a bit more special.
- Make it vegetarian: Skip the chicken and add black beans or extra veggies instead for a simple meat-free version.

Little Tricks That Make a Big Difference
- Soften the cream cheese first: Letting it sit out for a bit makes it much easier to mix, and you’ll get a smoother filling without lumps.
- Don’t overfill the tortillas: It’s tempting to pile it on, but a thinner layer rolls up better and keeps everything from squeezing out.
- Leave a small border around the edges: This helps seal the roll and keeps the filling neatly tucked inside.
- Roll them tightly: A firm roll gives you cleaner slices and helps the pinwheels hold their shape.
- Chill before slicing: This step really matters, as it firms everything up and makes cutting much easier and less messy.
- Use a sharp knife and wipe between cuts: It keeps the edges neat and stops the filling from dragging as you slice.

What to Serve with Mexican Pinwheels
- Serve with a simple salad: A light side salad balances out the creamy filling and makes it feel more like a proper meal.
- Add a bowl of tortilla chips and salsa: This keeps the flavors going and turns it into a really easy, shareable spread.
- Pair with fresh fruit: Something like grapes or sliced melon adds a bit of sweetness and works especially well for lunches.
- Include a dipping sauce: A little extra sour cream, salsa, or even guacamole on the side is always a good idea.
- Serve alongside soup: These go nicely with a bowl of tomato or chicken soup for a simple, comforting meal.
- Make it part of a party platter: Add a few other easy bites like veggie sticks, cheese cubes, or mini wraps to round things out.
FAQs
Can you make Mexican pinwheels ahead of time?
Yes, you can make them a few hours ahead or even the night before. Just keep them wrapped well in the fridge and slice them when you’re ready to serve.
How long do Mexican pinwheels last in the fridge?
They’ll keep well for up to 3 days in an airtight container. After that, the tortillas can start to soften a bit too much.
Can I freeze Mexican pinwheels?
It’s not recommended, as the cream cheese filling doesn’t freeze and thaw very well and can turn watery.
What tortillas work best for pinwheels?
Soft burrito-sized flour tortillas are ideal because they roll easily and hold the filling without cracking.
Can I use fresh chicken instead of canned chicken?
Absolutely, cooked and shredded chicken works perfectly and adds great flavor if you have some on hand.
How do you keep pinwheels from getting soggy?
Make sure your filling isn’t too wet and keep them tightly wrapped in the fridge. Slicing just before serving also helps keep them fresh.
Are Mexican pinwheels good for parties?
Yes, they’re a great party food because they’re easy to make ahead, simple to serve, and always popular with both kids and adults.
Can I make these Mexican pinwheels without cream cheese?
Cream cheese gives the best texture, but you could try a thick spread like Greek yogurt mixed with shredded cheese, though the result will be a bit different.
Mexican Pinwheels
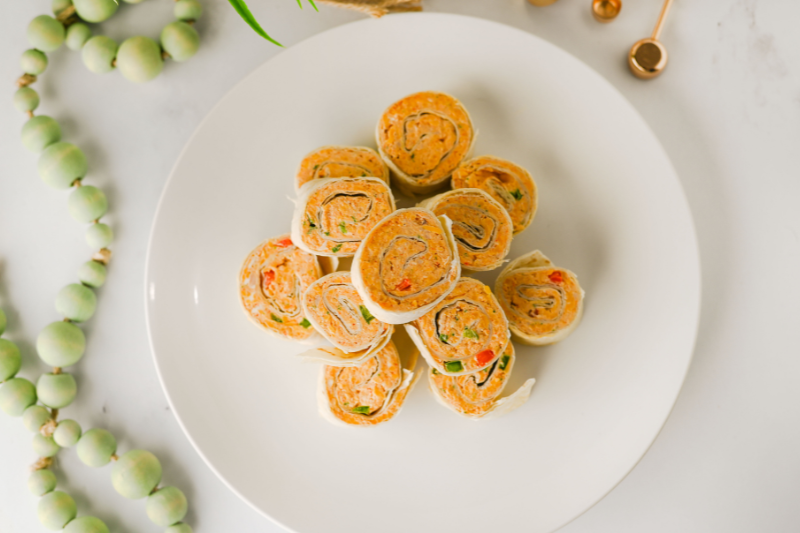
Creamy, flavorful Mexican pinwheels made with chicken, cheese, and simple pantry ingredients, all rolled into soft tortillas and sliced into bite-sized pieces. These are easy to make ahead, budget-friendly, and perfect for lunchboxes, snacks, or casual get-togethers.
Ingredients
- 8 ounces cream cheese
- 1/4 cup sour cream
- 2 (4.5 oz.) cans of chunk chicken breast (or 8 ounces of any cooked chicken)
- 1 cup shredded cheddar cheese
- 2 green onions, sliced
- 2 tbsp diced green bell pepper
- 2 tbsp diced red bell pepper
- 1 tbsp chopped cilantro
- 2 tbsp taco seasoning
- 4 burrito tortillas
Instructions
- Prepare the filling by using a hand mixer to blend the cream cheese, sour cream, chicken, green onions, bell pepper, cilantro, and taco seasoning in a large bowl until smooth and well combined.
- Spread the mixture by taking one tortilla and evenly spreading about 1/4 of the filling over it, leaving about a 1/2-inch border around the edges.
- Roll the tortilla tightly and set it aside.
- Repeat the process with the remaining tortillas and filling.
- Chill the rolls by placing them in the refrigerator for about 1 hour to firm up.
- Slice and serve by cutting each rolled tortilla into 1 to 1 1/2-inch pinwheels.
Notes
- Let the cream cheese soften before mixing so you get a smooth, easy-to-spread filling.
- Don’t skip the chilling time, as it helps the rolls firm up and makes slicing much neater.
- If using canned chicken, drain it well to avoid a watery filling.
- You can use leftover cooked chicken instead for extra flavor and less waste.
- Adjust the taco seasoning to taste if you prefer a milder or stronger flavor.
- Wrap the rolls tightly in plastic wrap while chilling to keep them from drying out.
- Slice just before serving for the best texture and appearance.
- Store any leftovers in an airtight container in the fridge for up to 3 days.
Nutrition Information:
Yield:
4Serving Size:
1Amount Per Serving: Calories: 723Total Fat: 48gSaturated Fat: 26gUnsaturated Fat: 22gCholesterol: 154mgSodium: 1361mgCarbohydrates: 39gFiber: 3gSugar: 4gProtein: 32g