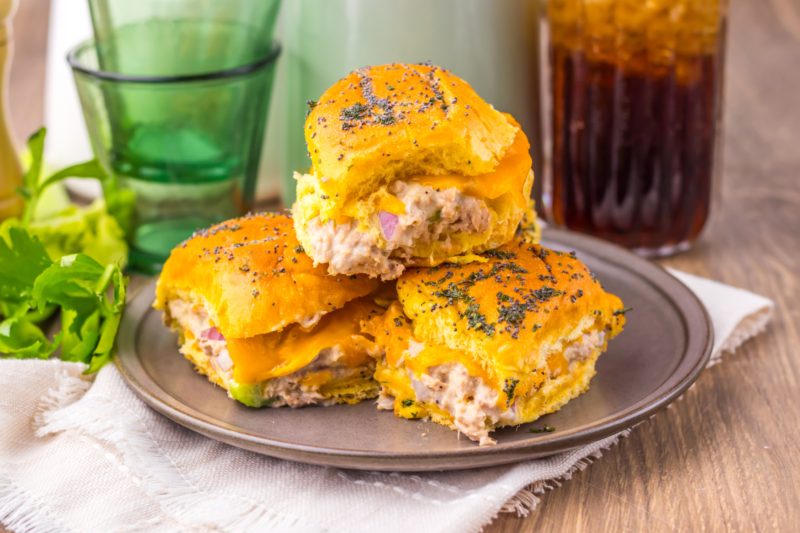
Easy Garlic Butter Tuna Melt Sliders
There are some nights when I open the pantry, spot a couple cans of tuna, and realize dinner is going to need a little creativity. That’s exactly how these tuna melt sliders ended up in our regular meal rotation. They take simple ingredients I usually already have on hand and turn them into something warm, cheesy, and filling that feels a lot more exciting than plain tuna sandwiches.
I love recipes like this because they’re quick enough for busy weeknights but still feel homemade. While the sliders bake, I can toss together a quick salad, slice up some fruit, or help with homework at the kitchen table. My kids love anything served on soft slider rolls, and the melted cheese on top makes these disappear fast in our house.
They’re also easy on the grocery budget, which is always a win for me. Tuna is affordable, shelf-stable, and great to keep stocked for nights when I don’t feel like making another trip to the store. If you need an easy lunch, simple dinner, or something casual to serve on game day, these little sliders are always a solid choice.
Why We Love This Recipe
- It’s budget-friendly and pantry-friendly. Canned tuna is one of those staples I always keep on hand, and this turns a few simple ingredients into a meal that feels a little more fun.
- They come together fast. On busy days when everyone’s hungry right now, these are quick to assemble and bake in under 15 minutes.
- They’re great for lunch or dinner. I love recipes that can pull double duty, and these work just as well for an easy family lunch as they do for a simple weeknight meal.
- Even picky eaters tend to go for them. The melted cheese and soft slider rolls make these feel like comfort food, which helps when you’ve got kids who aren’t always excited about tuna.
- They’re easy to customize. You can swap the cheese, add pickles, or leave out the onions for kids who prefer things a little simpler.
- Leftovers reheat surprisingly well. If you happen to have any left, they make an easy lunch the next day without much extra effort.

Equipment
- Large mixing bowl – You’ll need this to mix the tuna filling together, and it gives you plenty of room to stir everything without making a mess.
- Fork – Perfect for breaking up the tuna and mixing it into the creamy filling.
- Cutting board – Makes it easy to safely chop the celery, onion, and parsley before assembling everything.
- Sharp knife – Helpful for finely dicing the vegetables so they mix evenly into the tuna filling.
- Measuring cups and spoons – Keeps everything simple and helps you get the right balance of flavors in the filling and butter topping.
- Small mixing bowl – This is handy for stirring together the melted butter, poppy seeds, parsley, and garlic powder for brushing over the rolls.
- Pastry brush – Makes it easy to spread that buttery topping over the sliders so every roll gets a little extra flavor.
- 9×13 baking dish – A baking dish keeps the sliders snug while they bake so the cheese melts nicely and everything stays together.
- Sharp knife or spatula for serving – Once they’re baked, this helps you cut and lift the sliders out without pulling them apart.

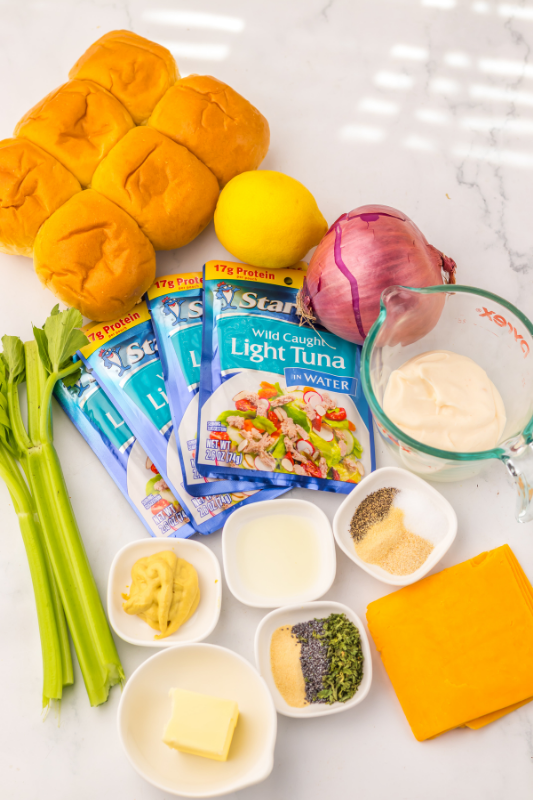
Ingredients
- 2 (5 oz) cans tuna, drained – This affordable pantry staple makes these sliders easy to throw together without needing a trip to the store.
- ½ cup mayonnaise – Adds creaminess and helps hold the tuna mixture together so every bite stays nice and flavorful.
- 1 tablespoon Dijon mustard – Gives the filling a little tang that pairs really well with the tuna and cheese.
- 1 teaspoon lemon juice – Brightens everything up and keeps the filling from tasting too heavy.
- ½ teaspoon garlic powder – Adds easy flavor without needing to chop fresh garlic.
- ½ teaspoon onion powder – Brings a little extra savory flavor to the tuna mixture.
- ½ teaspoon salt – Helps bring all the flavors together.
- ½ teaspoon pepper – Adds a little seasoning without making things too spicy for kids.
- ½ cup finely diced celery – Adds a fresh crunch that balances out the creamy filling.
- ½ cup finely diced red onion – Gives the sliders a little bite and extra flavor, but you can use less if your family prefers a milder taste.
- 12 slider rolls – Soft slider rolls make these fun to eat and perfect for feeding a hungry family.
- 4 slices cheddar cheese – Melts beautifully over the tuna mixture and gives these sliders that classic comfort food feel.
- 2 tablespoons butter, melted – Brushed over the tops for extra flavor and that golden finish.
- 1 teaspoon poppy seeds – Adds a little texture and makes the tops look extra special with hardly any effort.
- 1 teaspoon chopped parsley – Adds a pop of color and a little freshness to the buttery topping.
- ½ teaspoon garlic powder – Mixed into the butter topping for even more flavor on those soft, golden rolls.
Recipe Instructions
You can find a printable recipe card at the bottom of this post.
Step 1: Preheat your oven to 350°F and lightly grease a baking dish.
Step 2: Add the drained tuna to a large mixing bowl and flake it apart with a fork.
Step 3: Stir in the mayonnaise, Dijon mustard, lemon juice, garlic powder, onion powder, salt, and pepper until the mixture is smooth and creamy.
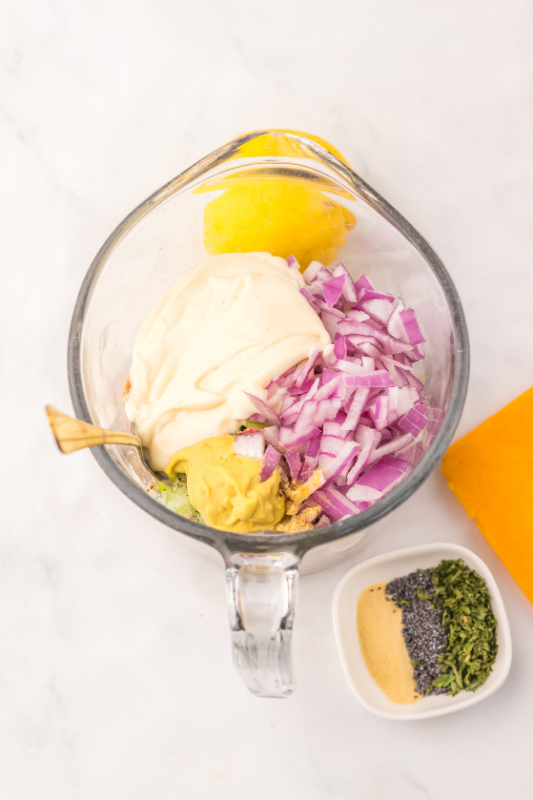
Step 4: Fold in the diced celery and onion, making sure everything is evenly combined.
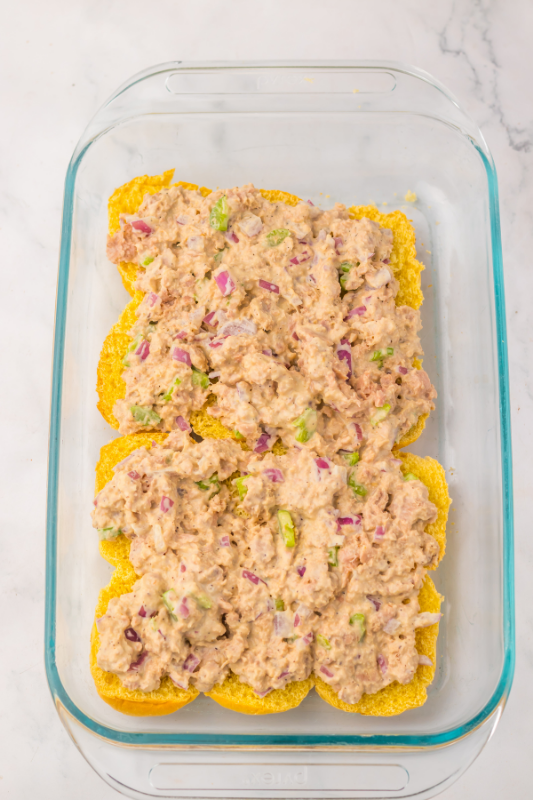
Step 5: Slice the slider rolls in half horizontally and place the bottom half of the rolls into the prepared baking dish.
Step 6: Spread the tuna mixture evenly over the rolls, then layer the cheddar cheese slices on top.
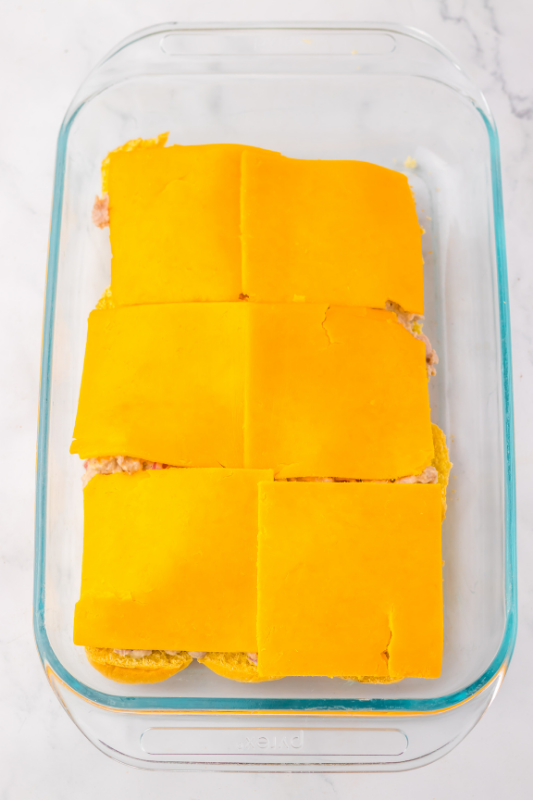
Step 7: Place the top half of the rolls over the cheese layer.
Step 8: In a small bowl, combine the melted butter, poppy seeds, parsley, and garlic powder.

Step 9: Brush the butter mixture over the tops of the rolls.

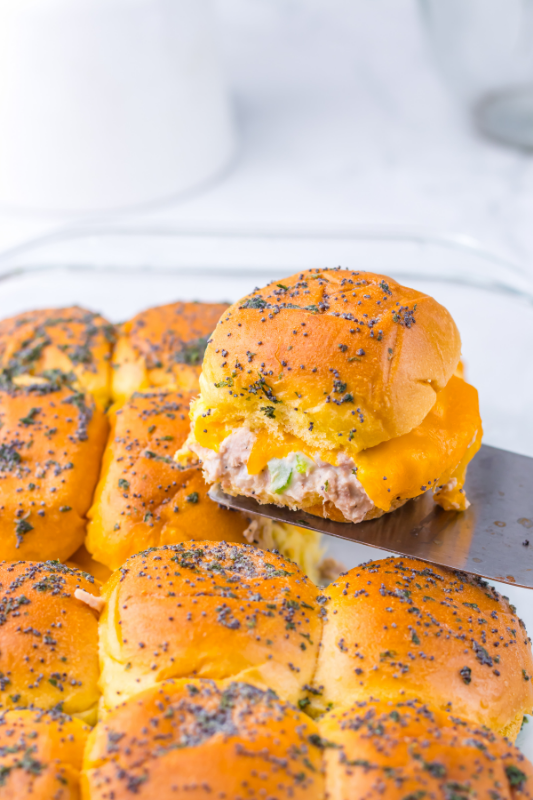
Step 10: Bake for 12 to 15 minutes, or until the cheese is melted and the tops are lightly golden.

Step 11: Remove from the oven, slice into individual sliders, and serve warm.
Serving & Storing
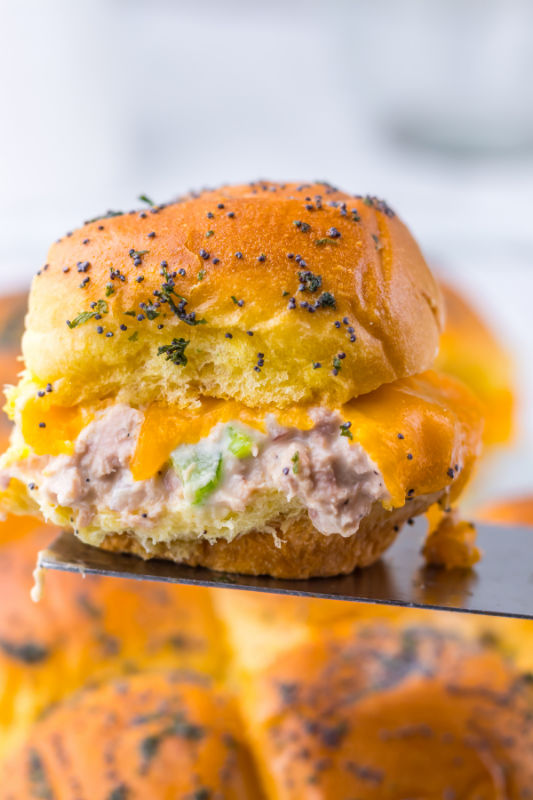
- Serve them warm for the best texture. The cheese is nice and melty straight out of the oven, and the rolls are soft with just a little crispness on top.
- Pair them with simple sides. We love these with chips, fruit, pasta salad, veggie sticks, or a quick green salad when I want to round things out without extra work.
- They’re great for casual get-togethers. These sliders are easy to set out for game day, family movie night, or when kids have friends over.
- Store leftovers in the fridge. Place any leftover sliders in an airtight container and keep them refrigerated for up to 3 days.
- Reheat in the oven or air fryer. This helps the rolls stay from getting soggy and warms the filling through nicely. A few minutes at 350°F usually does the trick.
- Skip freezing if you can. The tuna filling can become watery once thawed, so these are definitely better made fresh or enjoyed within a few days.

Variations & Substitutions
- Swap the cheese. Cheddar is always a safe choice, but Swiss, provolone, mozzarella, or pepper jack all work well if that’s what you already have in the fridge.
- Use a different type of bread. If you don’t have slider rolls, you can make these on hamburger buns, sandwich rolls, or even sliced bread and turn them into regular tuna melts.
- Add pickles for extra tang. A few chopped pickles or a spoonful of relish mixed into the tuna filling adds a fun little twist.
- Keep the onions mild. If red onion feels too strong for your family, swap it for green onions or leave it out completely.
- Make them a little lighter. You can replace part of the mayonnaise with plain Greek yogurt if you want a lighter filling that still stays creamy.
- Add extra crunch. Chopped bell peppers or shredded carrots can be mixed in if you want to sneak in a few extra veggies.
- Try a different protein. Canned salmon or shredded rotisserie chicken can work in place of tuna if that’s what you have on hand.
- Make them kid-friendly. If your kids prefer simple flavors, leave out the celery and onion and stick with a basic tuna and cheese filling.

Little Tricks That Make a Big Difference
- Drain the tuna really well. This keeps the filling from turning watery and helps the sliders hold together better once they’re baked.
- Dice the celery and onion small. Smaller pieces blend into the filling nicely and make the sliders easier for kids to eat.
- Don’t overfill the rolls. It can be tempting to pile on the tuna mixture, but keeping the layers even helps everything stay neatly inside the rolls.
- Cover with foil if the tops brown too fast. If your rolls are getting too dark before the cheese melts, loosely cover the pan for the last few minutes of baking.
- Use freshly shredded cheese if you have time. It melts a little smoother than pre-sliced or bagged cheese, but honestly use what works for your schedule.
- Let them sit for a minute before slicing. Giving them a minute or two out of the oven helps the filling settle so they’re less messy to serve.
- Brush the butter mixture all the way to the edges. Those little corners get golden and flavorful, and nobody wants a dry roll.

What to Serve with Tuna Melt Sliders
- Fresh fruit – Grapes, apple slices, watermelon, or berries add something light and fresh alongside the warm, cheesy sliders. It’s an easy option when you don’t feel like cooking another side dish.
- Potato chips or kettle chips – This is such an easy pairing and gives you that classic sandwich-and-chips combo everyone seems to love.
- Pasta salad – A simple pasta salad is great if you’re serving these for lunch, parties, or summer get-togethers.
- Coleslaw – The cool crunch works really well with the warm sliders and balances out the richness.
- Veggie sticks and ranch dip – Carrots, cucumbers, celery, and bell peppers are an easy way to add something fresh to the plate.
- Soup – Tomato soup or a simple vegetable soup turns these sliders into a cozy meal on cooler days.
- French fries or sweet potato fries – If you want more of a diner-style meal at home, fries are always a fun option.
- Pickles – I love setting out a bowl of pickles on the side because they add a little tang and take almost no effort.

FAQs
Can I make tuna melt sliders ahead of time?
Yes, you can assemble the sliders a few hours ahead and keep them covered in the fridge until you’re ready to bake. I’d wait to brush on the butter topping until right before they go in the oven so the rolls don’t get soggy.
Can I use canned salmon instead of tuna for sliders?
Absolutely. Canned salmon works well in this recipe and gives you a similar easy, budget-friendly option if that’s what you already have in the pantry.
What kind of cheese works best for tuna melt sliders?
Cheddar is a great choice because it melts well and has plenty of flavor, but Swiss, provolone, mozzarella, or pepper jack are all tasty options too.
How do I keep tuna sliders from getting soggy?
Make sure the tuna is drained well before mixing the filling. You’ll also want to avoid adding too much mayo and bake the sliders until the tops are lightly golden.
Can I reheat leftover tuna melt sliders?
Yes, leftovers reheat well in the oven or air fryer. A few minutes at 350°F helps warm them through while keeping the rolls from getting too soft.
Are tuna melt sliders good for parties?
They really are. They’re easy to make in a big batch, simple to serve, and work well for game day, casual lunches, or family gatherings.
Can I freeze tuna melt sliders?
You can, but I don’t usually recommend it. The filling can release extra moisture after thawing, so they taste much better fresh or refrigerated for a couple of days.

Garlic Butter Tuna Melt Sliders

These Tuna Melt Sliders are warm, cheesy, and so easy to make with simple pantry staples. Packed with creamy tuna filling, melty cheddar cheese, and buttery toasted rolls, they’re perfect for quick lunches, easy dinners, game day snacks, or casual family gatherings.
Ingredients
- 2 (5 oz) cans tuna, drained
- ½ cup mayonnaise
- 1 tablespoon Dijon mustard
- 1 teaspoon lemon juice
- ½ teaspoon garlic powder
- ½ teaspoon onion powder
- ½ teaspoon salt
- ½ teaspoon pepper
- ½ cup finely diced celery
- ½ cup finely diced red onion
- 12 slider rolls
- 4 slices cheddar cheese
- 2 tablespoons butter, melted
- 1 teaspoon poppy seeds
- 1 teaspoon chopped parsley
- ½ teaspoon garlic powder
Instructions
- Preheat your oven to 350°F and lightly grease a baking dish.
- Add the drained tuna to a large mixing bowl and flake it apart with a fork.
- Stir in the mayonnaise, Dijon mustard, lemon juice, garlic powder, onion powder, salt, and pepper until the mixture is smooth and creamy.
- Fold in the diced celery and onion, making sure everything is evenly combined.
- Slice the slider rolls in half horizontally and place the bottom half of the rolls into the prepared baking dish.
- Spread the tuna mixture evenly over the rolls, then layer the cheddar cheese slices on top.
- Place the top half of the rolls over the cheese layer.
- In a small bowl, combine the melted butter, poppy seeds, parsley, and garlic powder.
- Brush the butter mixture over the tops of the rolls.
- Bake for 12 to 15 minutes, or until the cheese is melted and the tops are lightly golden.
- Remove from the oven, slice into individual sliders, and serve warm.
Notes
- Drain the tuna well so the filling doesn’t turn watery.
- Dice the celery and onion finely so they mix evenly into the filling and are easier for kids to enjoy.
- If your family prefers milder flavors, you can reduce the onion or leave it out completely.
- Swap cheddar for Swiss, provolone, mozzarella, or any cheese you have on hand.
- Brush the butter topping on right before baking for the best texture.
- Cover loosely with foil if the tops start browning too quickly.
- Leftovers can be stored in the fridge for up to 3 days and reheated in the oven or air fryer.
- This recipe is easy to double if you’re feeding a crowd or making them for a party.
Nutrition Information:
Yield:
12Serving Size:
1Amount Per Serving: Calories: 201Total Fat: 12gSaturated Fat: 3gUnsaturated Fat: 9gCholesterol: 15mgSodium: 370mgCarbohydrates: 17gFiber: 2gSugar: 3gProtein: 7g