Spooky Peanut Butter Cornflake Cookies for Halloween
Halloween is one of my favorite times of the year, and if you’re like me, you love making treats that are as fun as they are delicious. These Spooky Peanut Butter Cornflake Cookies are the perfect combination of crispy, sweet, and just the right amount of peanut butter goodness. They’re super easy to whip up, and the best part is there’s no baking required! The crunchy cornflakes, combined with that caramel-like peanut butter coating, make these cookies irresistible. Plus, they’re perfect for a Halloween party or just a fun activity with the kids.
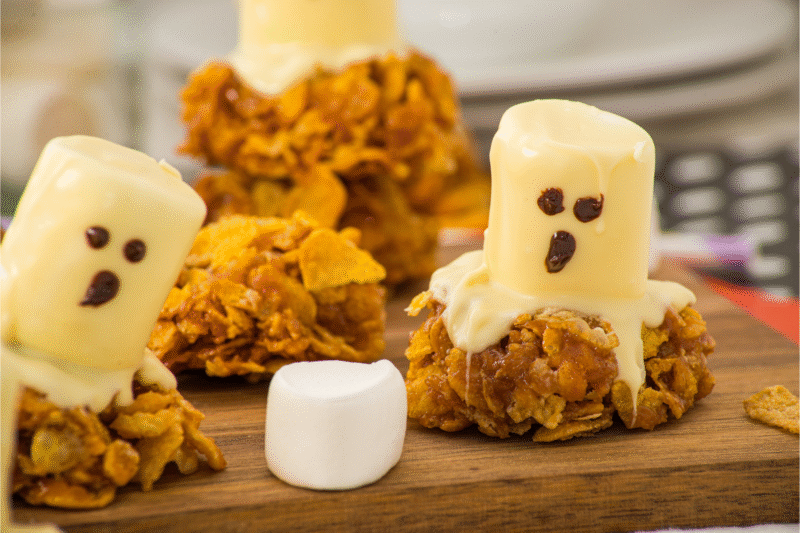
I love how these cookies can be dressed up with some simple decorations to give them that spooky Halloween vibe. A drizzle of white chocolate, a little marshmallow for a ghostly touch, and a few dark chocolate eyes and mouths make each cookie look like a mini monster. It’s a great way to get creative without needing to spend hours in the kitchen. Trust me, they’ll be the star of your Halloween spread!
Not only do these cookies taste amazing, but they also make the perfect gift for friends or neighbors. They’re fun to make, fun to eat, and the kids will love getting involved in the decorating. So if you’re looking for a quick and spooky treat to add to your Halloween festivities, these Peanut Butter Cornflake Cookies will definitely do the trick!

Ingredients
For the cookies:
-
4 cups corn flake cereal: Start with a big bowl of cornflake cereal for that crispy crunch in every bite.
-
1/2 cup peanut butter: Add creamy peanut butter to bring that rich, nutty flavor to the mix.
-
1/2 cup syrup: A generous pour of syrup gives these cookies that sweet, caramel-like goodness.
-
1/2 teaspoon salt: A pinch of salt helps balance out the sweetness and enhances the flavors.
-
1 teaspoon vanilla extract: Vanilla extract adds a lovely depth of flavor to these spooky treats.
For the decoration:
-
1 cup white chocolate, melted: Melted white chocolate will give your cookies a creamy, spooky coating.
-
1 tbsp dark chocolate (for eyes and mouth): Use dark chocolate for some extra drama when you draw eyes and mouths on your marshmallows.
-
18 marshmallows: The marshmallows serve as the perfect base for creating those adorable ghostly faces.

Step-by-Step Instructions
You can find a printable recipe card at the bottom of this post.
Prepare the caramel:
1. In a saucepan, combine the sugar, syrup, and peanut butter.

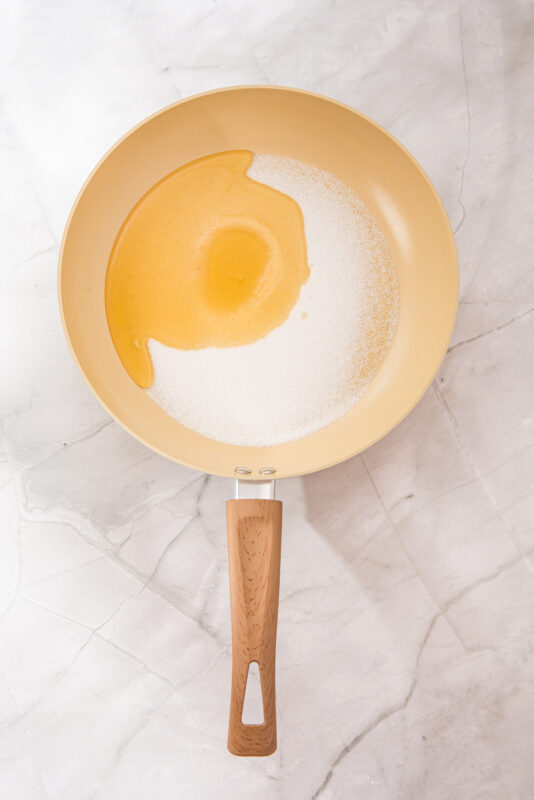
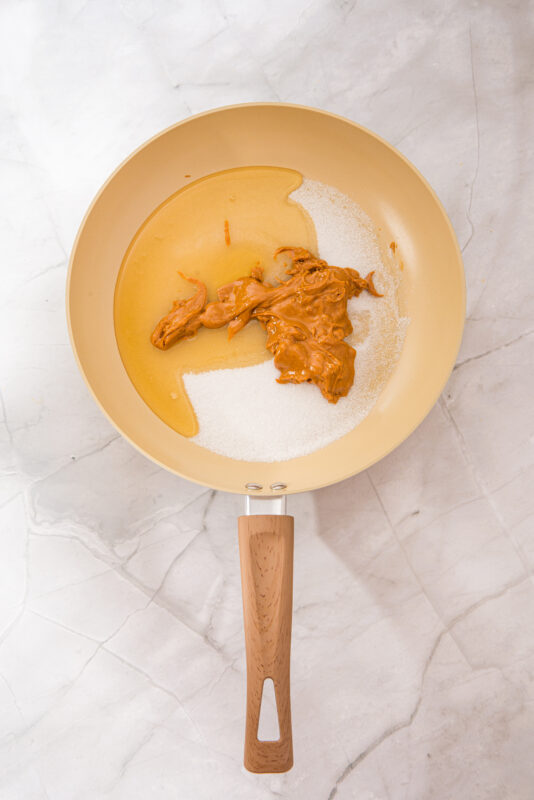
2. Heat over medium heat, stirring constantly to prevent burning.
3. Continue stirring until the mixture becomes smooth and caramel-like.

4. Remove from heat once it’s smooth.
5. Stir in the vanilla extract and salt.
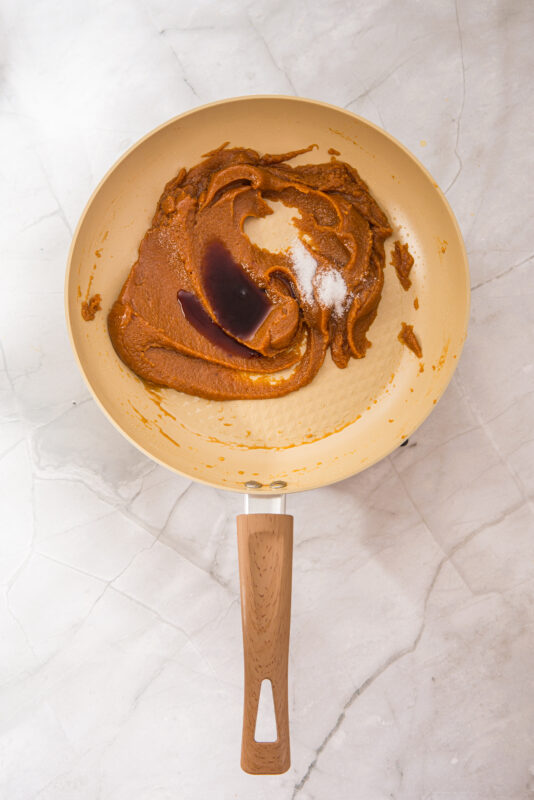
6. Mix well until fully combined.

Shape the cookies:
1. Pour the hot caramel mixture over the cornflakes in a large bowl.
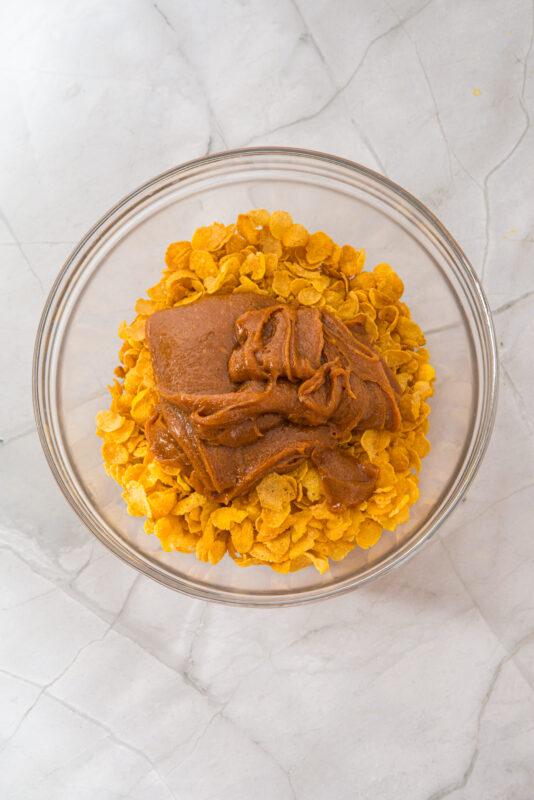
2. Gently stir with a spatula to coat all the cereal evenly.
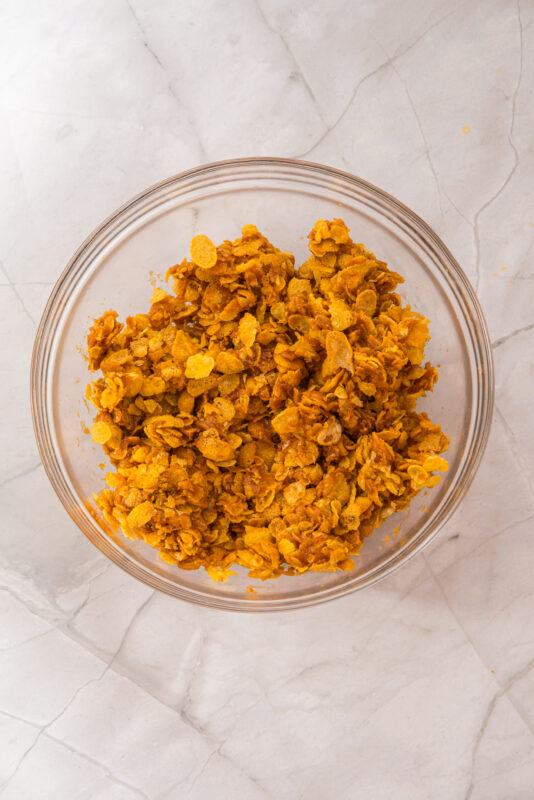
3. Use a cookie scoop (size 20 recommended) to take portions of the mixture.
4. Place each scoop onto parchment paper, a baking sheet, or a cooling rack.
5. Slightly flatten each scoop to shape a cookie.
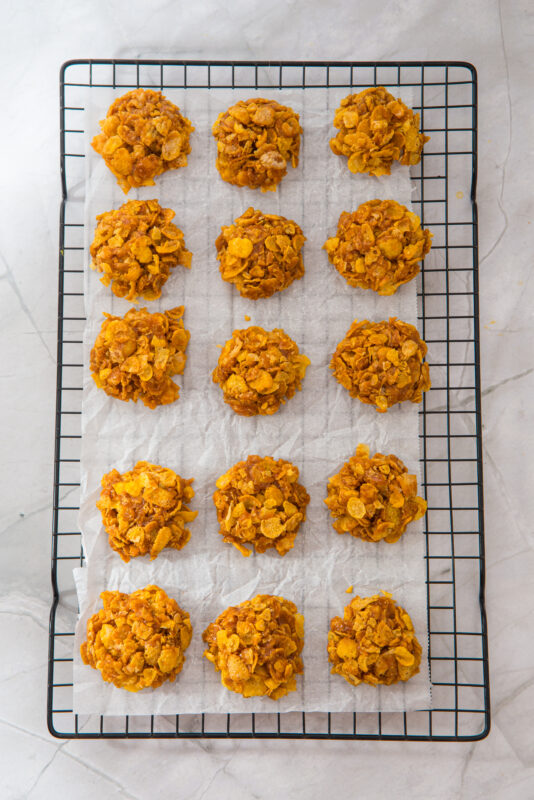
6. Let the cookies cool at room temperature until they are set.
Halloween-style decoration:
1. Melt the white chocolate in a heatproof bowl.
2. Place a small amount of melted white chocolate on top of each cookie.
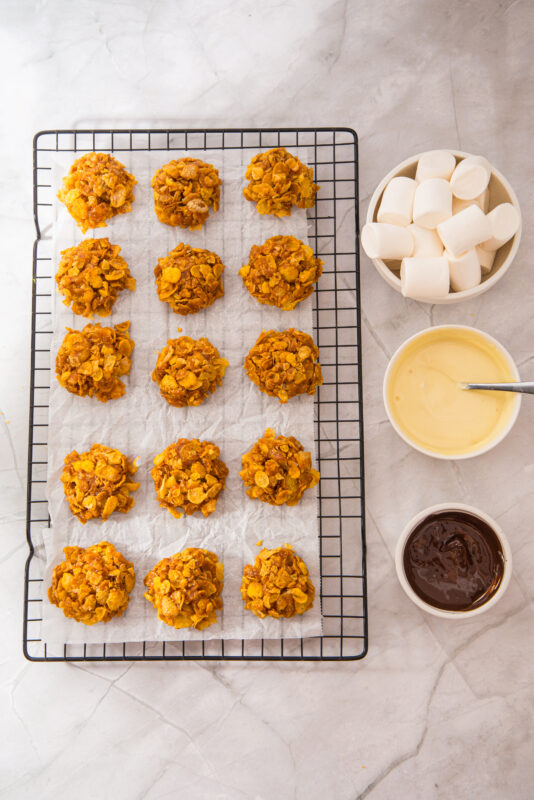
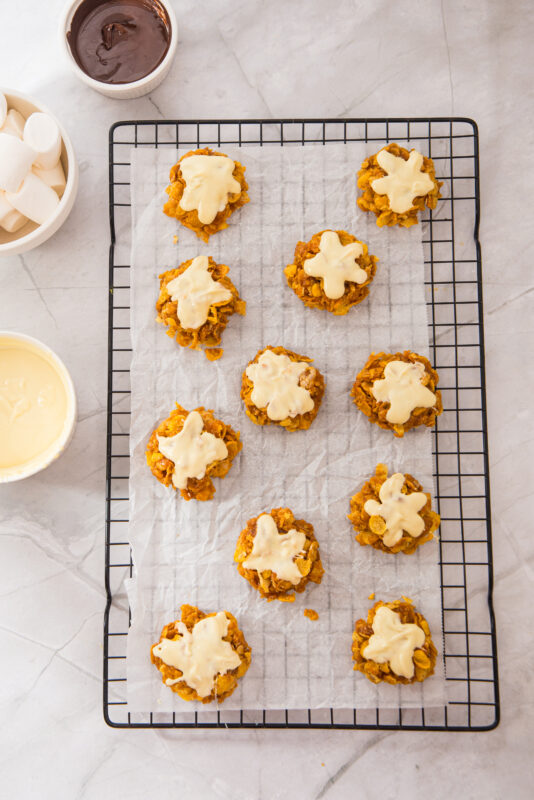
3. Dip marshmallows into the melted white chocolate.
4. Remove any excess white chocolate from the marshmallow with a fork.
5. Place the marshmallows on top of each cookie.
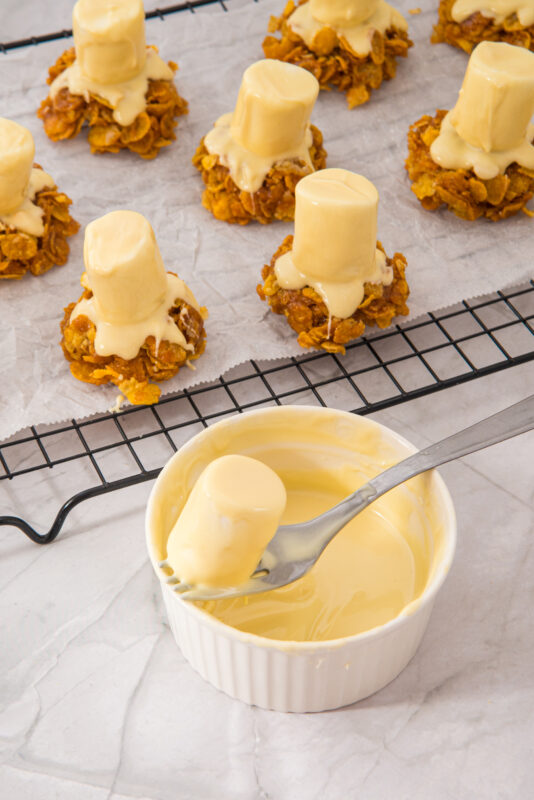
6. Let the chocolate cool and set (refrigerate if necessary).
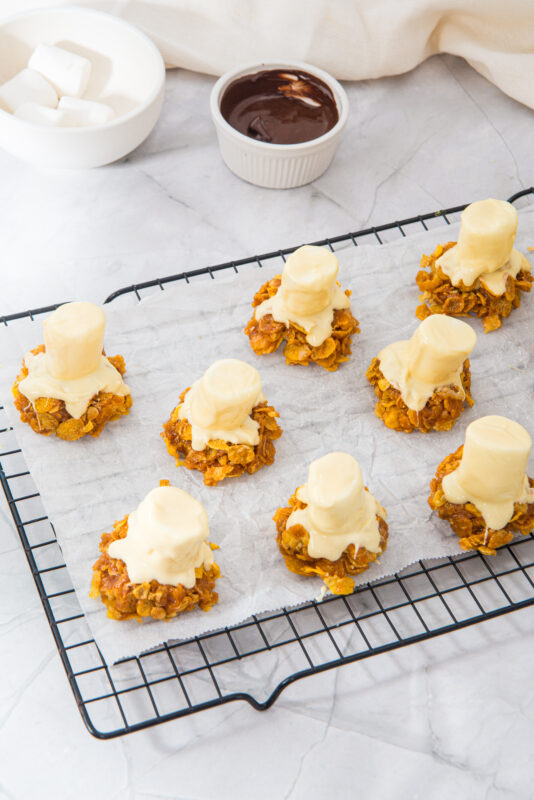
7. Use a toothpick dipped in melted dark chocolate to draw eyes and mouths on the marshmallows.


Tips for the Perfect Spooky Peanut Butter Cornflake Cookies
-
Don’t overmix the cornflakes: Gently stir the caramel mixture with the cornflakes to coat them evenly, but don’t crush them! You want that perfect crunch in every bite.
-
Use a cookie scoop for even portions: A cookie scoop (size 20 works great) makes it super easy to create uniform cookies. Plus, they’ll all look adorable and evenly sized!
-
Let the cookies cool completely: Be patient and let the cookies cool at room temperature before decorating them. This ensures the chocolate sets nicely and doesn’t melt all over the place.
-
Get creative with the faces: The dark chocolate eyes and mouths are totally customizable! You can make them spooky, silly, or even add fun details like little scars or fangs.
-
Refrigerate for faster set-up: If you’re in a rush, pop the cookies in the fridge for a few minutes after decorating. It helps the chocolate set faster, so you can enjoy them sooner!

Get Creative!
-
Add extra toppings: Want to take your cookies to the next level? Try adding some colorful sprinkles, edible googly eyes, or even a dash of orange zest for a fun twist!
-
Mix up the cereal: If you’re feeling adventurous, swap out some of the cornflakes with other cereals like Rice Krispies or even a handful of pretzels for a salty-sweet combo.
-
Try different shapes: Use cookie cutters to shape the cookies into fun Halloween-themed shapes like pumpkins, ghosts, or bats before you start decorating.
-
Use different chocolates: While white chocolate gives a nice contrast, try dark or milk chocolate for the decoration too, mixing and matching gives your cookies a unique look.
-
Make mini versions: Want smaller treats? Just scoop out less dough to make mini cookies. Perfect for little hands or if you’re looking to make a bite-sized Halloween snack!

Serving & Storing
-
Perfect for Halloween parties: These spooky cookies make a fun and festive treat for Halloween gatherings. Serve them on a platter or set up a cookie decorating station for guests to add their own touches.
-
Store them in an airtight container: Keep your cookies fresh by storing them in an airtight container at room temperature. They’ll stay crispy and delicious for up to a week.
-
Make them year-round: If you want a snack that’s perfect for any time of year, simply leave off the marshmallow decoration. The peanut butter cornflake cookies are still amazing on their own without the spooky touch!
-
Freeze for later: These cookies freeze beautifully! Just layer them with parchment paper in an airtight container and pop them in the freezer. When you’re ready, thaw them at room temperature or pop them in the microwave for a quick snack.

Spooky Peanut Butter Cornflake Cookies for Halloween

These Spooky Peanut Butter Cornflake Cookies are a fun and easy no-bake treat perfect for Halloween! With a crunchy cornflake base coated in peanut butter and syrup, they’re topped with marshmallow ghosts and decorated with chocolate faces for a spooky twist. Quick to make and delicious, they’re sure to be a hit at your next Halloween party, or anytime you crave a sweet, crispy snack!
Ingredients
For the cookies:
- 4 cups corn flake cereal
- 1/2 cup peanut butter
- 1/2 cup syrup
- 1/2 teaspoon salt
- 1 teaspoon vanilla extract
For the decoration:
- 1 cup white chocolate, melted
- 1 tbsp dark chocolate, (for eyes and mouth)
- 18 marshmallows
Instructions
Prepare the caramel:
- In a saucepan, combine the sugar, syrup, and peanut butter.
- Heat over medium heat, stirring constantly to prevent burning.
- Continue stirring until the mixture becomes smooth and caramel-like.
- Remove from heat once it’s smooth.
- Stir in the vanilla extract and salt.
- Mix well until fully combined.
Shape the cookies:
- Pour the hot caramel mixture over the cornflakes in a large bowl.
- Gently stir with a spatula to coat all the cereal evenly.
- Use a cookie scoop (size 20 recommended) to take portions of the mixture.
- Place each scoop onto parchment paper, a baking sheet, or a cooling rack.
- Slightly flatten each scoop to shape a cookie.
- Let the cookies cool at room temperature until they are set.
Halloween-style decoration:
- Melt the white chocolate in a heatproof bowl.
- Place a small amount of melted white chocolate on top of each cookie.
- Dip marshmallows into the melted white chocolate.
- Remove any excess white chocolate from the marshmallow with a fork.
- Place the marshmallows on top of each cookie.
- Let the chocolate cool and set (refrigerate if necessary).
- Use a toothpick dipped in melted dark chocolate to draw eyes and mouths on the marshmallows.