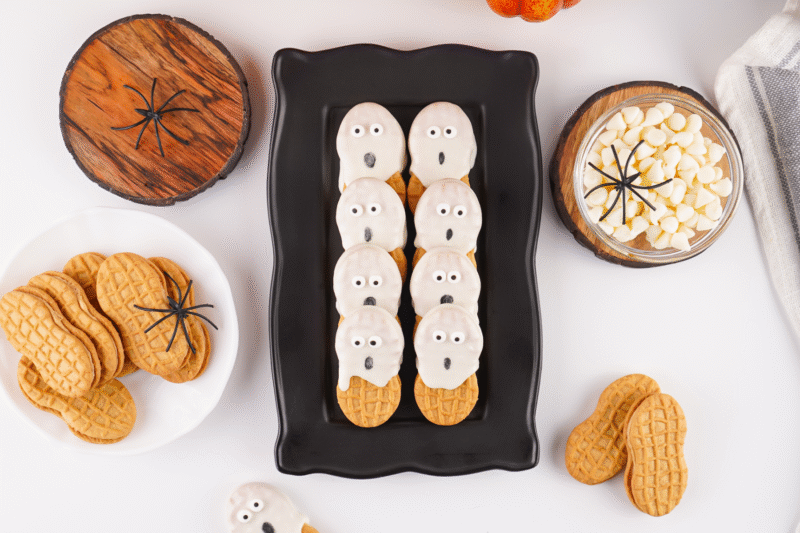
Cute & Creepy Nutter Butter Ghosts for Halloween
Halloween is hands down one of my favorite times of the year, especially when it comes to making fun treats. I love creating snacks that are festive but still super easy, and these Nutter Butter Ghosts check all the boxes. They’re the perfect mix of cute and just a little bit creepy, which makes them ideal for any spooky gathering, whether it’s a school party, a Halloween bash at home, or just a fun weekend activity with the kids.
What I really enjoy about these ghost cookies is how quick they come together. With just a handful of ingredients – Nutter Butters, white chocolate, candy eyes, and a marker – you can transform a simple store-bought cookie into a Halloween showstopper. I’ve made these with my kids before, and they always have a blast helping with the dipping, decorating, and of course, sneaking a cookie or two along the way.
They’re also the kind of treat that looks like you spent way more time on them than you actually did. Guests are always impressed, and I love that I can whip up a batch in no time at all. Plus, you can get creative with the ghostly faces, making some look surprised, some silly, and some downright spooky. These Cute & Creepy Nutter Butter Ghosts are a Halloween tradition I look forward to every year!

Ingredients
-
20 Nutter Butter Cookies – the perfect base for turning into spooky little ghosts.
-
2 Cups White Chocolate Chips – melted into smooth, creamy “sheets” for our ghostly look.
-
Small Candy Eyes – because every ghost needs a pair of hauntingly cute eyes.
-
Black Edible Marker – to draw those creepy or silly mouths that bring each ghost to life.

Recipe Instructions
You can find a printable recipe card at the bottom of this post.
1. Place white chocolate chips in a small bowl or cup (a coffee cup works well) and microwave on high for 2 minutes, stirring every 30 seconds until smooth.


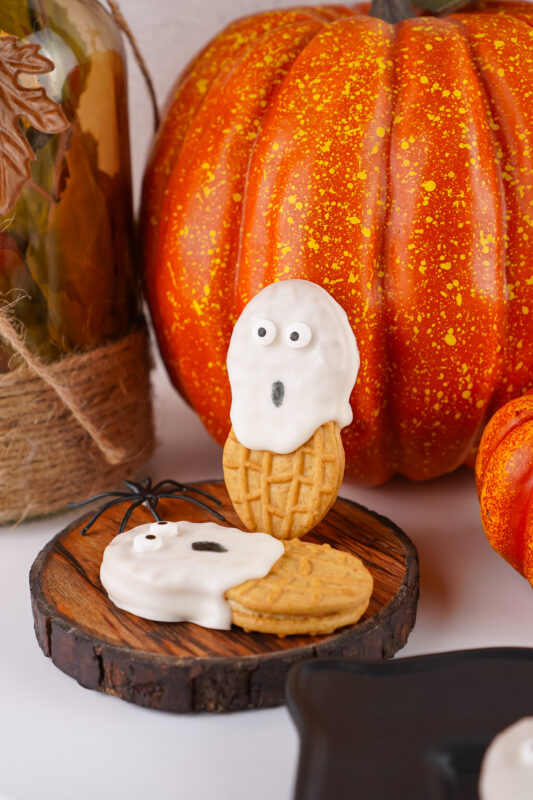
2. Dip each cookie halfway into the melted chocolate, letting excess drip off, then hold upright and gently shake or tap the uncovered end so some chocolate drips down the front for a ghostly effect.


3. Place the coated cookies on parchment paper and add two candy eyes near the top using baking tweezers if desired.

4. Repeat with remaining cookies, then freeze for 5 minutes to set.

5. Use an edible black marker to draw mouths just below the chocolate line, then serve and enjoy.


My Favorite Ways to Enjoy Nutter Butter Ghosts
-
I love serving these on a big Halloween party platter mixed in with candy corn, pretzels, and other spooky goodies.
-
They make such a cute surprise in my kids’ lunchboxes during October, it always makes them smile.
-
I’ve even wrapped a few in little treat bags with ribbon to hand out as party favors or classroom snacks.
-
Pairing them with a mug of hot cocoa or apple cider makes them feel extra cozy on a chilly fall night.
-
Sometimes I get creative and stick them upright in cupcakes or a Halloween cake for an easy (and edible) decoration.

Serving & Storing
-
These cookies are best served once the chocolate has fully set so they keep their cute ghostly shape.
-
If you’re making them ahead, keep them in an airtight container at room temperature for 3–4 days.
-
For longer storage, you can refrigerate them, just let them come to room temp before serving so the chocolate isn’t too hard.
-
If stacking, place a layer of parchment paper between each layer to keep the decorations neat and the chocolate from sticking.
-
They’re sturdy enough to travel, which makes them perfect for taking along to Halloween parties or school events.
Variations
-
Turn them into mummies by drizzling extra white chocolate across the front like bandages.
-
Swap the white chocolate for dark or milk chocolate and make “shadow ghosts” for a spookier twist.
-
Use colored candy melts (like orange or green) instead of white for playful Halloween characters.
-
Add a little red gel icing under the eyes for a creepier, “bloody tears” effect.
-
Mix up the faces. Make some silly, some scary, and some surprised to give your cookie platter personality.

Substitutions
-
If you can’t find Nutter Butters, try using Milano cookies, Vienna Fingers, or any oval-shaped cookie as the base.
-
White candy melts can be swapped in for the chocolate chips if you want a smoother coating that sets quickly.
-
No candy eyes on hand? Mini chocolate chips, black sprinkles, or dots of melted chocolate work just as well.
-
If you don’t have an edible marker, you can pipe on little mouths using melted dark chocolate or black icing.
-
For a nut-free version, simply choose a sandwich cookie that doesn’t contain peanut butter filling.

FAQs
Can I make these ahead of time?
Yes! These ghosts can be made 2–3 days in advance. Just store them in an airtight container until you’re ready to serve.
Do I need to refrigerate them?
Not necessarily. They keep well at room temperature, but if your kitchen is warm, you can pop them in the fridge so the chocolate doesn’t soften.
What if I don’t have Nutter Butters?
No problem. Any oval-shaped cookie will work. Vienna Fingers, Milanos, or even homemade shortbread cookies make great substitutes.
Can kids help make these?
Absolutely! Kids love dipping the cookies and adding the candy eyes. You may just need to help with the chocolate melting and drawing the mouths.
How do I stop the chocolate from clumping when melting?
Make sure to stir every 30 seconds while microwaving, and don’t overheat it. If it thickens, add a tiny bit of coconut oil or shortening to smooth it out.

Nutter Butter Ghosts

These Nutter Butter Ghosts are the cutest no-bake Halloween treat! Made with just cookies, white chocolate, candy eyes, and a marker, they’re quick to make, kid-friendly, and guaranteed to disappear fast at any spooky party.
Ingredients
- 20 Nutter Butter Cookies
- 2 Cups White Chocolate Chips
- Small Candy Eyes
- Black Edible Marker
Instructions
- Place white chocolate chips in a small bowl or cup (a coffee cup works well) and microwave on high for 2 minutes, stirring every 30 seconds until smooth.
- Dip each cookie halfway into the melted chocolate, letting excess drip off, then hold upright and gently shake or tap the uncovered end so some chocolate drips down the front for a ghostly effect.
- Place the coated cookies on parchment paper and add two candy eyes near the top using baking tweezers if desired.
- Repeat with remaining cookies, then freeze for 5 minutes to set.
- Use an edible black marker to draw mouths just below the chocolate line, then serve and enjoy.