No-Bake Polar Bear Oreos for a Fun Winter Dessert Idea
There’s just something about cute themed treats that makes me so happy, and these No-Bake Polar Bear Oreos might be one of my favorites yet. They’re so simple to make, but they look like you spent ages putting them together. I love that they only take a few basic ingredients, yet the end result is absolutely adorable and perfect for winter. They’re the kind of dessert that makes everyone smile before they even take a bite.
What I really enjoy about these little guys is how much fun they are to decorate. Dipping Oreos in smooth white candy melts and adding tiny candy eyes and ears feels almost like a craft project, but one you get to eat afterward. My kids always want to help with this one, and honestly, I don’t mind at all because it’s a project that turns into a sweet treat. Plus, since there’s no baking required, it’s practically foolproof.
I like to make a batch of these Polar Bear Oreos for holiday parties, snow day snacks, or even as a cute edible gift. They add such a playful touch to a dessert table and pair perfectly with other wintery treats like hot cocoa or marshmallow snowmen. They’re also easy to make ahead of time, so you can whip them up, let them set, and be party-ready without any stress. These little polar bears are guaranteed to bring some extra cheer to your winter celebrations.

Make sure you also take a look at my other Christmas Cookie Recipes:

Items Needed
- Medium microwave safe mixing bowl
- Cookie sheet or cooling rack
- Parchment paper
- Candy dipper or fork
Ingredients
-
14.3oz bag (405g, 36 cookies) of regular Oreo cookies – the classic cookie base that turns into our adorable little polar bears.
-
2 cups (12oz, 340g) white candy melts – this smooth coating gives the Oreos their snowy white fur.
-
72 candy eyeballs – because no polar bear is complete without a pair of cute eyes staring back at you.
-
1 tablespoon black cookie frosting – the perfect finishing touch to add a tiny nose and bring your bears to life.

Recipe Instructions
You can find a printable recipe card at the bottom of this post.
1. Line a cookie sheet or cooling rack with parchment paper to keep the cookies from sticking.
2. Count out 72 candy melts and separate them into two groups of 36. Set one group aside for later. Take the other 36 and carefully cut each in half with a sharp knife to make the ears.

3. Place the remaining candy melts into a microwave-safe bowl. Heat them at 50% power for 1 minute, then stir. Continue heating in 30-second intervals at 50% power, stirring each time, until the candy is smooth and fully melted. Depending on your microwave, this may take up to 5 minutes.

4. Using a fork or candy dipper, dip each Oreo into the melted candy until fully coated. Let the excess drip off before placing it onto the prepared parchment paper.

5. While the coating is still soft, press a whole candy melt onto the lower half of the Oreo for the snout. Add two candy eyes above the snout, then place two candy melt halves on either side of the cookie to create the ears.
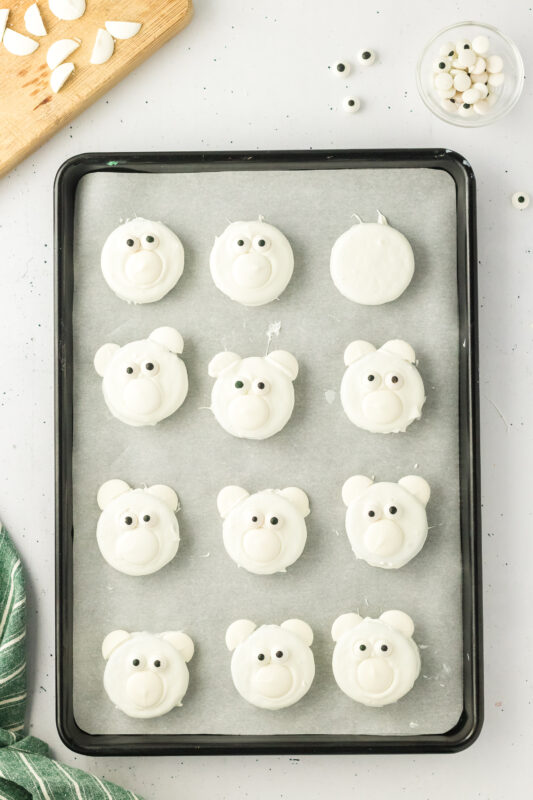
6. Allow the cookies to sit for about 10 minutes until the coating hardens. Once set, use the black cookie icing to pipe a small nose onto each snout. Let them rest for another 5 minutes before serving.


My Favorite Ways to Enjoy Polar Bear Oreos
-
I love serving these alongside a big mug of hot cocoa topped with whipped cream for the ultimate cozy winter treat.
-
They make the cutest addition to a holiday cookie tray, and they always get the most attention.
-
My kids like to pack one in their lunchbox for a fun surprise during the school day.
-
I sometimes wrap them up in little treat bags with ribbon and give them as edible gifts to friends and neighbors.
-
They’re perfect for a snow day activity because making and eating them feels like part of the fun.
-
I’ve even used them as cupcake toppers for a winter birthday party, and they looked absolutely adorable.

Serving & Storing
-
I usually let the cookies set completely before moving them, so they don’t smudge and keep their cute little faces intact.
-
These are best served at room temperature, but I sometimes pop them in the fridge for a few minutes if I want the candy coating extra firm.
-
If I’m making them for a party, I like to arrange them on a platter with shredded coconut sprinkled around to look like snow.
-
To store, I keep them in an airtight container on the counter for up to 4–5 days.
-
You can also refrigerate them if your kitchen runs warm, but be sure to let them sit out a few minutes before serving so the coating softens just a bit.
-
They’re sturdy enough to make ahead, so I often prep a batch the day before an event and they’re still perfect the next day.

Variations
-
Swap out the Oreos for different flavored sandwich cookies, like mint or golden Oreos, for a tasty twist.
-
Use colored candy melts to make pastel bears for a winter baby shower or birthday party.
-
Instead of polar bears, switch up the decorations and turn them into penguins or reindeer with just a few tweaks.
-
Add a sprinkle of shredded coconut over the top before the coating sets to give your bears a “snowy fur” look.
-
Try mini Oreos for bite-sized polar bears that are perfect for little hands (and even cuter).
-
Use chocolate Oreos with dark candy melts to create “black bears” for a fun variation.

Substitutions
-
If you can’t find candy eyeballs, mini chocolate chips or small dots of white and black icing work just as well.
-
Instead of black cookie frosting for the nose, a dab of melted chocolate or a mini chocolate sprinkle does the trick.
-
No candy melts? White chocolate chips or almond bark make a great coating substitute.
-
If Oreos aren’t your favorite, you can use any sandwich cookie with a similar size and shape.
-
For the ears, you can cut mini marshmallows in half if you don’t have extra candy melts to work with.

FAQs
Can I make these ahead of time?
Yes! I often make them a day or two in advance. Just store them in an airtight container and they’ll stay fresh and cute.
Do I have to use Oreos, or can I use another cookie?
Oreos work perfectly because they hold up well when dipped, but any sandwich cookie of a similar size will work. Just keep in mind the look may vary a bit.
What if I don’t have candy eyeballs?
No worries, mini chocolate chips, white chocolate dots with a dab of black icing, or even sprinkles can stand in as eyes.
How do I keep the coating smooth?
Make sure you melt the candy slowly at 50% power and stir often. If it gets too thick, you can stir in a tiny bit of shortening to thin it out.
Can these be frozen?
I don’t recommend freezing them because the coating can crack, but they do last several days at room temperature or in the fridge.

No-Bake Polar Bear Oreos
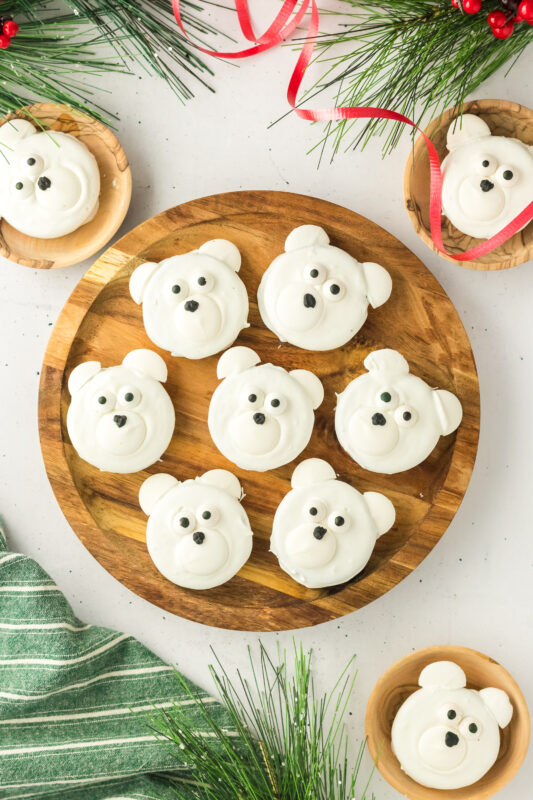
These No-Bake Polar Bear Oreos are the cutest winter treat! Made with Oreos, candy melts, and a few simple decorations, they come together quickly and are perfect for holiday parties, snow days, or edible gifts. Fun to make with kids and guaranteed to bring smiles!
Ingredients
- 4.3oz bag (405g, 36 cookies) of regular Oreo cookies
- 2 cups (12oz, 340g) white candy melts
- 72 candy eyeballs
- 1 tablespoon black cookie frosting
Instructions
- Line a cookie sheet or cooling rack with parchment paper to keep the cookies from sticking.
- Count out 72 candy melts and separate them into two groups of 36. Set one group aside for later. Take the other 36 and carefully cut each in half with a sharp knife to make the ears.
- Place the remaining candy melts into a microwave-safe bowl. Heat them at 50% power for 1 minute, then stir. Continue heating in 30-second intervals at 50% power, stirring each time, until the candy is smooth and fully melted. Depending on your microwave, this may take up to 5 minutes.
- Using a fork or candy dipper, dip each Oreo into the melted candy until fully coated. Let the excess drip off before placing it onto the prepared parchment paper.
- While the coating is still soft, press a whole candy melt onto the lower half of the Oreo for the snout. Add two candy eyes above the snout, then place two candy melt halves on either side of the cookie to create the ears.
- Allow the cookies to sit for about 10 minutes until the coating hardens. Once set, use the black cookie icing to pipe a small nose onto each snout. Let them rest for another 5 minutes before serving.