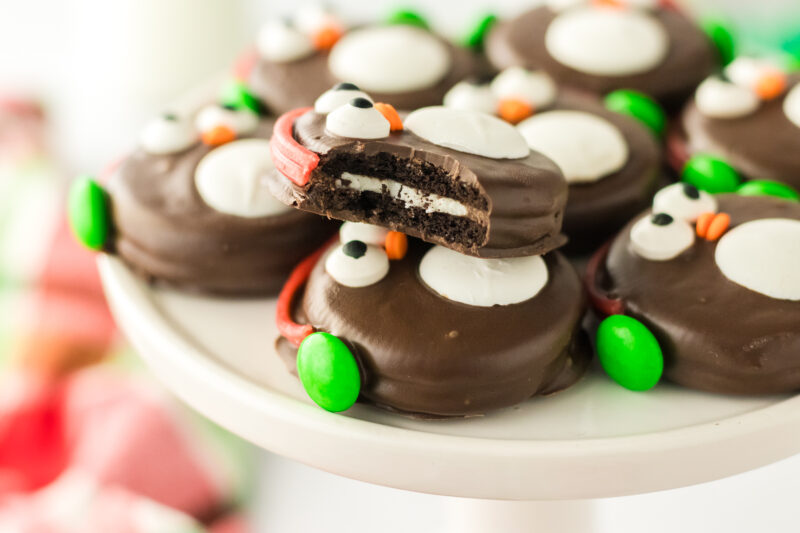
How to Make the Cutest Penguin Oreos
I love finding little treats that bring some extra joy to the season, and these Penguin Oreos might just be my favorite. They’re the perfect mix of cute and delicious, and the best part is how simple they are to make. Whenever I set them out at a party, they always get the biggest smiles and disappear in no time. It’s the kind of recipe that looks like it took hours, but really it’s just some Oreos, candy melts, and a few fun decorations.
What makes these Penguin Oreos so special is that they’re not just a snack, they’re an activity too. If you’ve got kids around, you’ll know how much they enjoy decorating treats, and this is one they can really get involved in. Each cookie becomes its own little personality, with the candy eyes and licorice “headbands” making them look like they’re bundled up for the snow. It’s honestly impossible not to smile while you’re putting them together.
These Penguin Oreos are perfect for holiday get-togethers, winter birthday parties, or even a cozy afternoon project. They’re budget-friendly, kid-approved, and make a playful addition to any dessert table. Plus, since there’s no baking involved, you can whip up a batch in less than an hour and still have plenty of time left to relax and enjoy the season.

Make sure you also take a look at my other Christmas Cookie Recipes:

Items Needed
- Medium microwave safe mixing bowl
- Cookie sheet or cooling rack
- Parchment paper
- Candy dipper or fork
Ingredients
-
14.3oz bag (405g, 36 cookies) of regular Oreo cookies – the classic cookie base that turns into your adorable penguins.
-
1 and 1/2 cups (9oz, 255g) chocolate candy melts – for coating each Oreo in a smooth, chocolatey shell.
-
36 white candy melts – these create the penguins’ cute little bellies.
-
72 M&M’s or smarties – perfect for making colorful penguin wings.
-
72 candy eyeballs – because every penguin needs a pair of big, playful eyes.
-
Pull and peel or shoelace licorice – makes the cutest little earmuffs to keep your penguins cozy.
-
72 orange confetti sprinkles – the finishing touch for tiny penguin beaks.

Recipe Instructions
You can find a printable recipe card at the bottom of this post.
1. Line a cookie sheet or cooling rack with parchment paper.
2. Place the chocolate candy melts in a microwave-safe bowl. Heat in the microwave at 50% power for 1 minute, then stir. Continue microwaving in 30-second intervals at 50% power, stirring after each round, until the candy is completely melted and smooth. This may take up to 5 minutes, depending on your microwave.

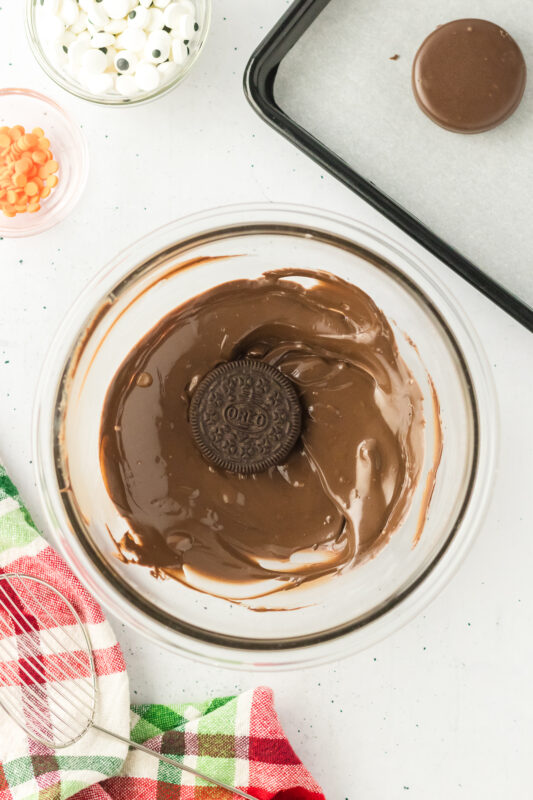
3. Using a fork or candy dipper, dip each Oreo cookie into the melted chocolate until fully coated. Let any extra chocolate drip off before placing it back on the parchment paper.
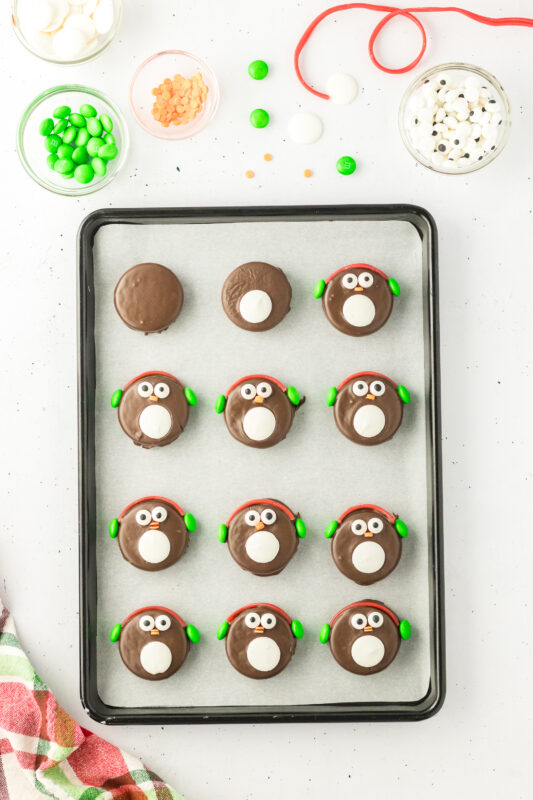
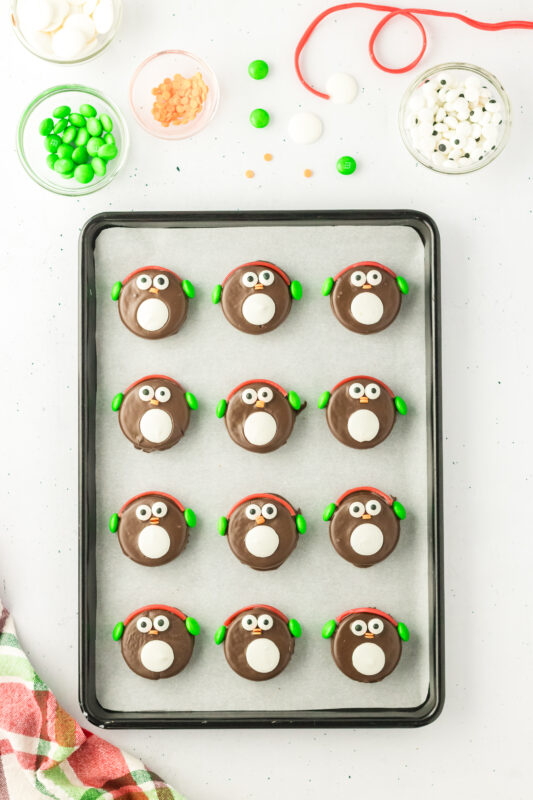
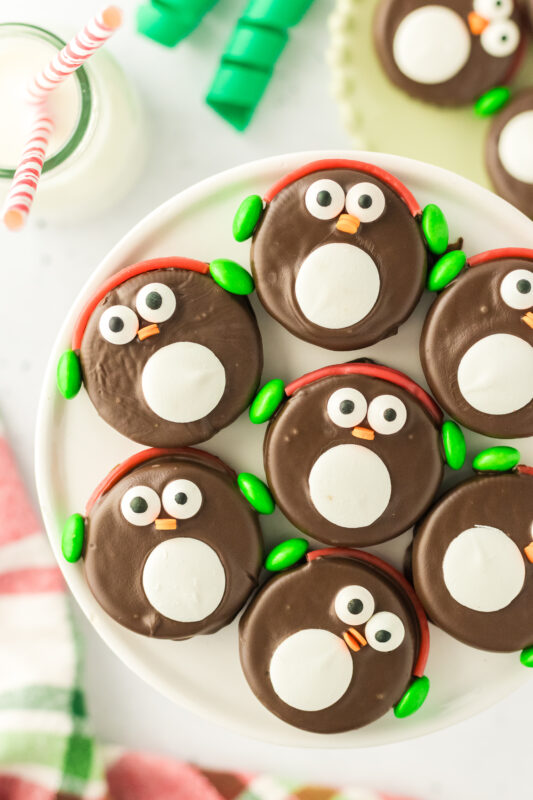
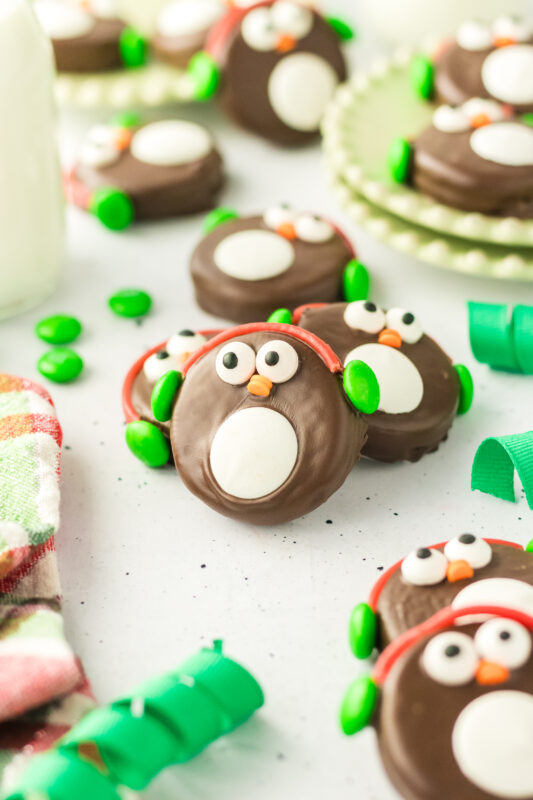
4. While the coating is still soft, press a white candy melt onto the lower half of the cookie to make the penguin’s belly. Add two candy eyeballs near the top, then place two orange confetti sprinkles just below the eyes to form the beak. Attach two M&M’s to the sides, and finish by using a piece of licorice to connect the M&M’s across the top like earmuffs.

My Favorite Ways to Enjoy Penguin Oreos
-
I love setting these little penguins out on a holiday dessert table because they always make people stop and smile before they grab one.
-
They’re the perfect treat for winter birthdays or classroom parties since they’re so fun and kid-friendly.
-
I like to wrap a few up in little cellophane bags and tie them with ribbon for a sweet homemade gift.
-
Sometimes I serve them alongside hot cocoa since the combo of chocolate cookies and a warm drink feels extra cozy.
-
They make a playful addition to a cookie exchange because they stand out from the usual holiday classics.
Serving & Storing
-
I like to serve these on a big platter so all the little penguins are lined up together, it makes them look extra adorable.
-
If I’m bringing them to a party, I’ll layer them gently in a container with parchment paper in between so they don’t stick.
-
These cookies keep really well in an airtight container at room temperature for about 4–5 days.
-
If you want them to last longer, pop them in the fridge and they’ll stay fresh for up to a week.
-
You can even freeze them for up to a month. Just make sure they’re in a freezer-safe container and let them thaw at room temperature before serving.
Variations
-
Sometimes I swap the regular Oreos for golden Oreos to make little snowy penguins.
-
You can change up the candy melts and use white chocolate for the coating if you want a frosty winter look.
-
I’ve tried using mini Reese’s cups for wings instead of M&M’s and they turned out so cute.
-
If you don’t have licorice, pretzel sticks or gummy strings work just as well for earmuffs.
-
I like to play around with different sprinkle colors for the beaks to give each penguin a little personality.

Substitutions
-
If you can’t find candy melts, you can use white or milk chocolate chips instead.
-
M&M’s and Smarties both work for wings, so just grab whichever you have on hand.
-
No orange confetti sprinkles? Tiny orange candies or even a small dab of orange icing will make a perfect beak.
-
Licorice is fun for earmuffs, but gummy strings or sour belts cut into thin strips work too.
-
If candy eyeballs aren’t available, you can use mini chocolate chips with a little white icing to make your own.

FAQs
Can I make these ahead of time?
Yes, you can! I like to make them a day or two before a party and keep them in an airtight container. They stay fresh and just as cute.
Do I have to use candy melts?
Not at all. Chocolate chips or almond bark work just fine if that’s what you have on hand. Just melt them the same way.
How do I keep the decorations from sliding off?
The trick is to add everything while the coating is still soft. Once it sets, the decorations will stay put.
Can kids help make these?
Absolutely. Kids love decorating these cookies, and each penguin turns out with its own little personality. Just be ready for some messy fingers.
Can I freeze Penguin Oreos?
Yes, you can freeze them in a freezer-safe container for up to a month. Let them thaw at room temperature before serving so they look their best.

Cute Penguin Oreos

These Penguin Oreos are almost too cute to eat. Made with Oreos, candy melts, and a handful of fun decorations, they’re the perfect no-bake treat for holiday parties, winter birthdays, or a cozy afternoon project with the kids. Quick to make and always a hit, these little penguins will bring big smiles to your dessert table.
Ingredients
- 14.3oz bag (405g, 36 cookies) of regular Oreo cookies
- 1 and 1/2 cups (9oz, 255g) chocolate candy melts
- 36 white candy melts
- 72 M&M’s or smarties
- 72 candy eyeballs
- Pull and peel or shoelace licorice
- 72 orange confetti sprinkles
Instructions
- Line a cookie sheet or cooling rack with parchment paper.
- Place the chocolate candy melts in a microwave-safe bowl. Heat in the microwave at 50% power for 1 minute, then stir. Continue microwaving in 30-second intervals at 50% power, stirring after each round, until the candy is completely melted and smooth. This may take up to 5 minutes, depending on your microwave.
- Using a fork or candy dipper, dip each Oreo cookie into the melted chocolate until fully coated. Let any extra chocolate drip off before placing it back on the parchment paper.
- While the coating is still soft, press a white candy melt onto the lower half of the cookie to make the penguin’s belly. Add two candy eyeballs near the top, then place two orange confetti sprinkles just below the eyes to form the beak. Attach two M&M’s to the sides, and finish by using a piece of licorice to connect the M&M’s across the top like earmuffs.